DigitalOcean
In this guide, we’ll walk you through deploying Care on DigitalOcean. We’ll keep things simple so you can follow along to get your instance up and running. Expect the process to take about an hour, depending on your familiarity with the tools.
Prerequisites
- A DigitalOcean account (Sign up here).
- A fork of the Care backend and frontend repositories.
- A registered domain name (optional but recommended).
- Basic familiarity with DigitalOcean's App Platform and Spaces.
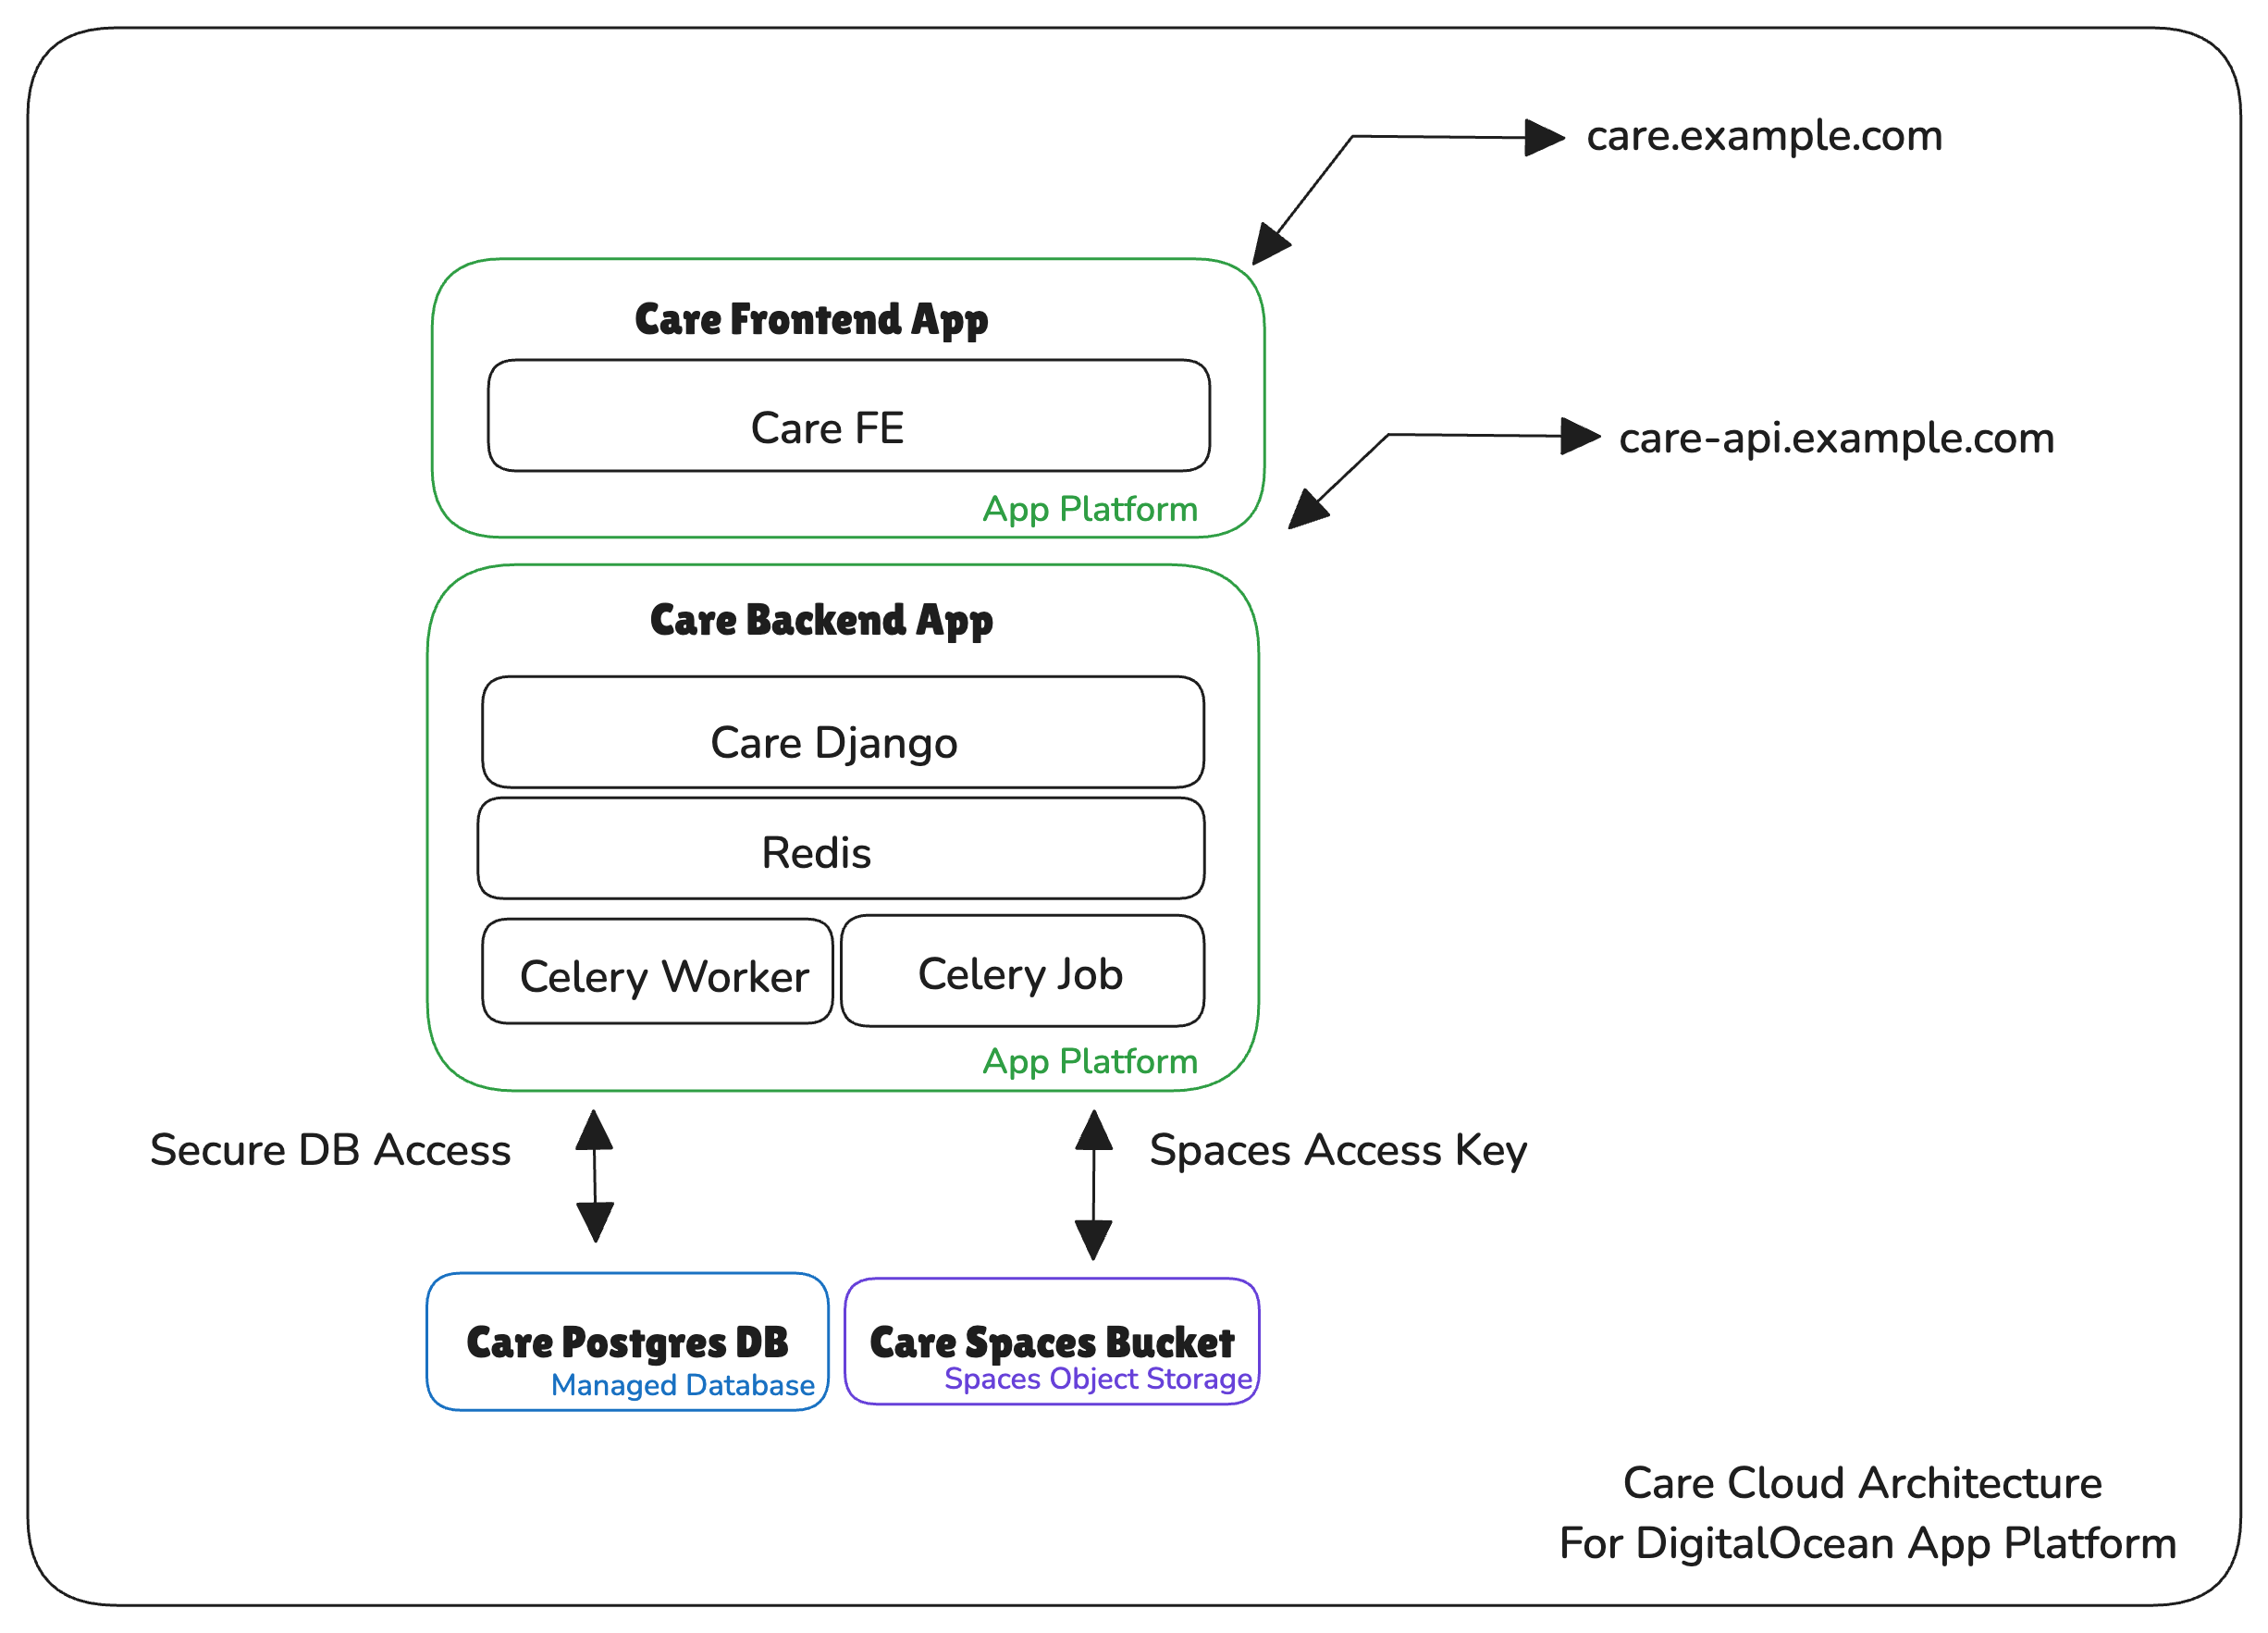
What You’ll Be Doing
- Set up a PostgreSQL database for secure data storage.
- Configure DigitalOcean Spaces for handling files and media.
- Deploy the Care backend with Redis and Celery for task management.
- Set up the Care frontend for user access.
- Secure the setup with custom domains, API keys, and SSL.
- Setup a CI/CD Pipeline for Continuous Deployment.
Step 1: Create the Database
1.1 Navigate to Databases
- Log in to DigitalOcean and go to the Databases section.
1.2 Create a PostgreSQL Database
-
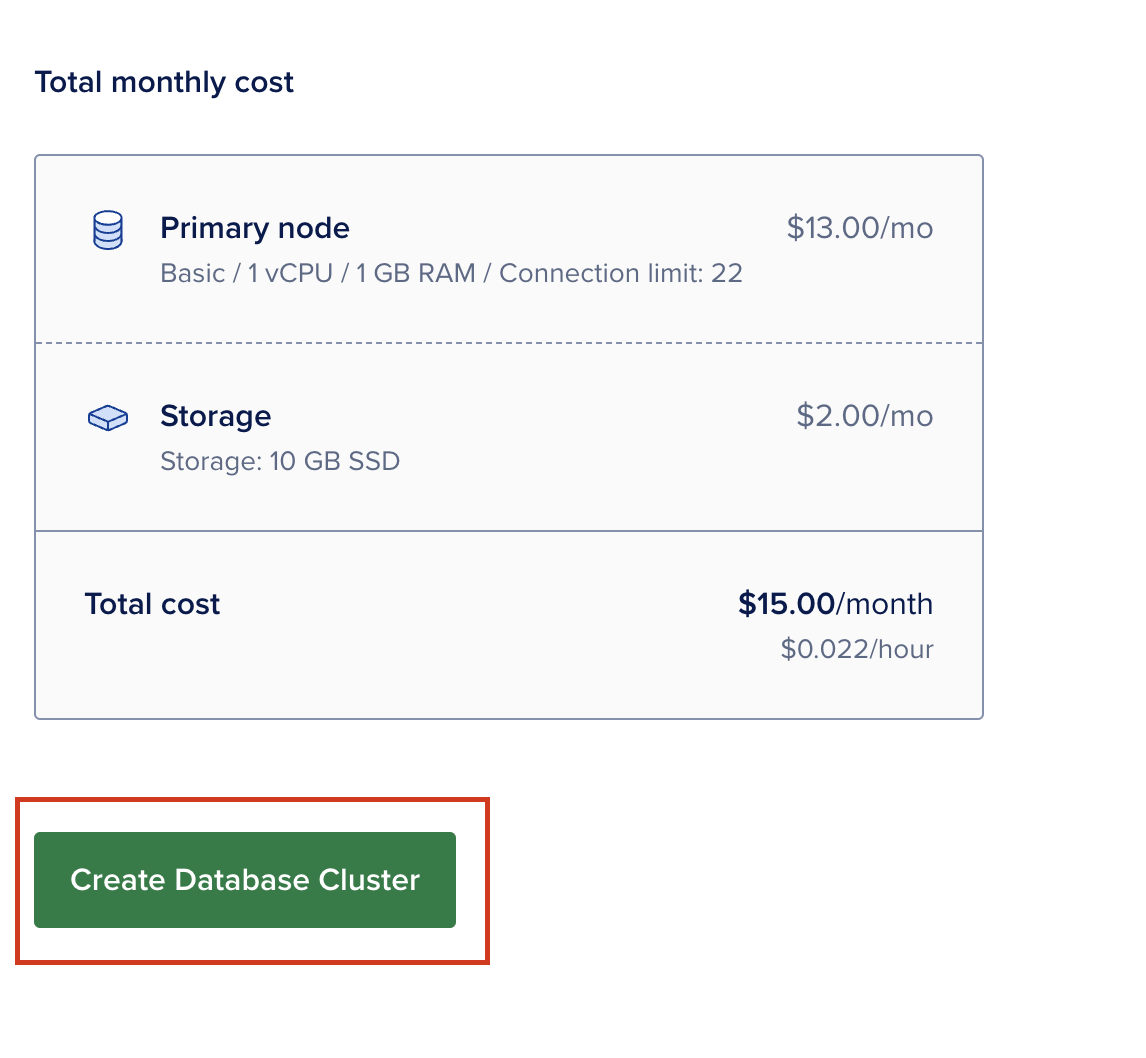
Click Create Database.
-
Choose the following:
- Region: Select the nearest data center.
- Engine: PostgreSQL (Version 16).
- Resources: Select a plan based on your requirements.
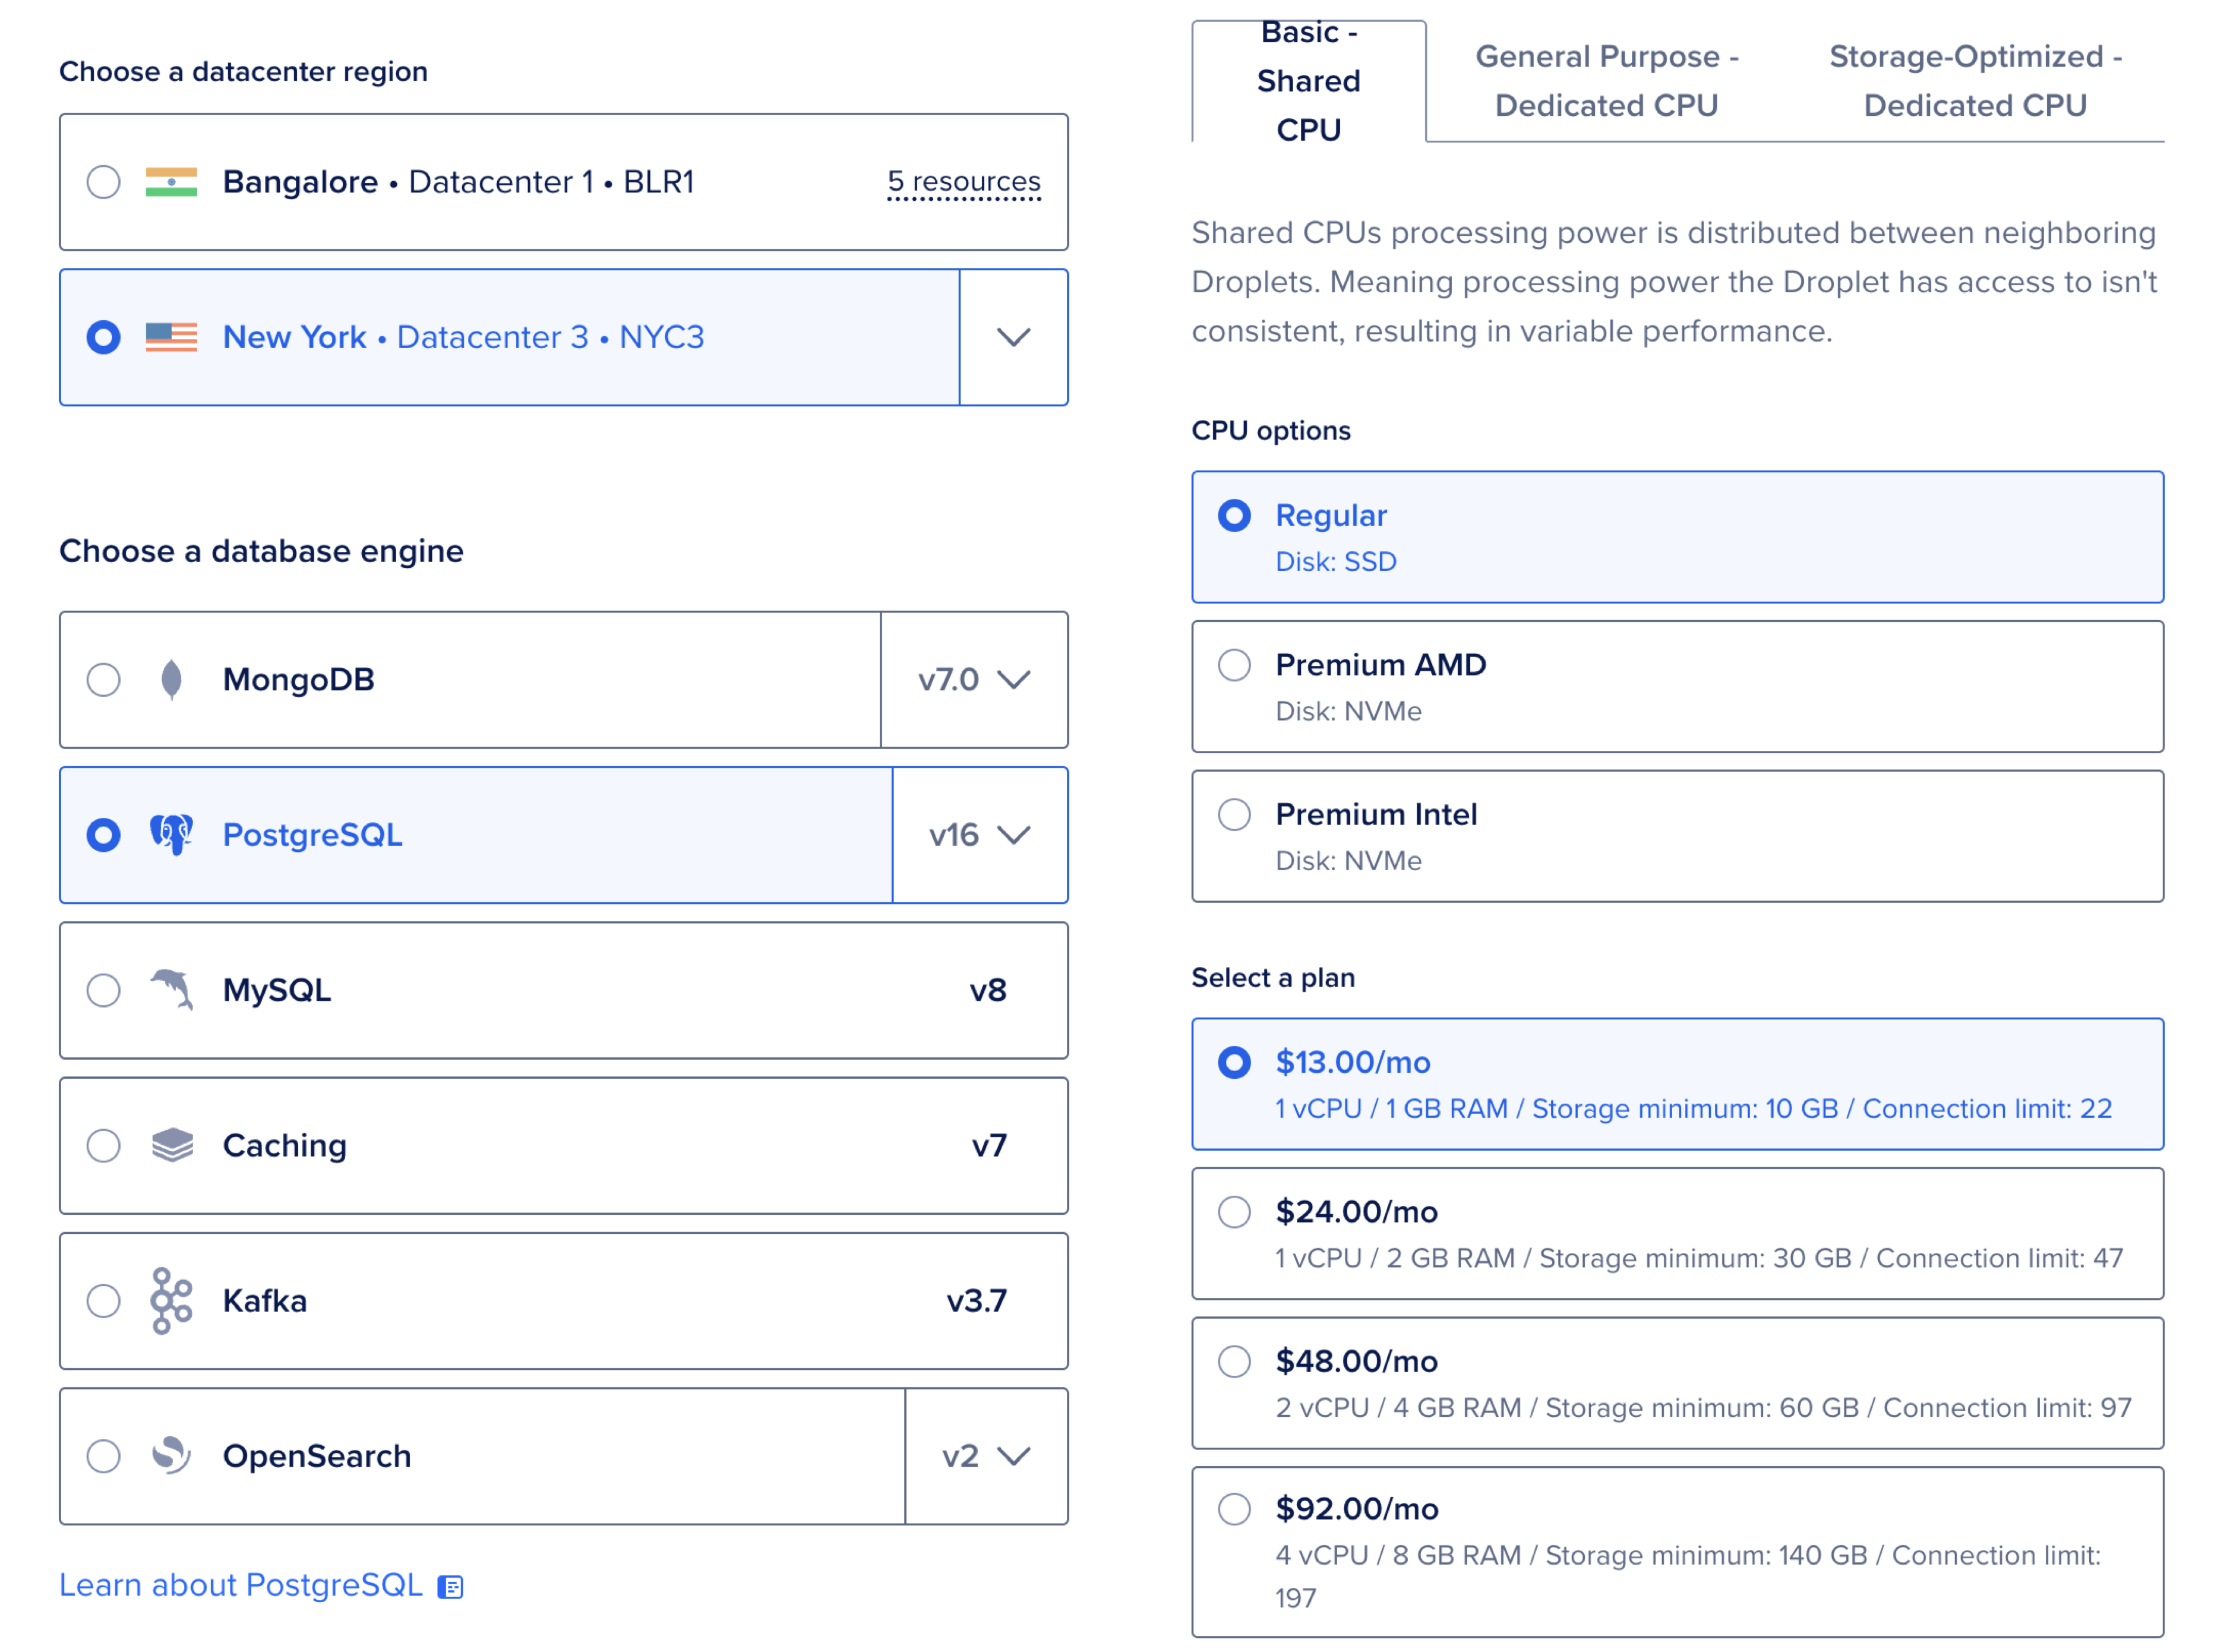
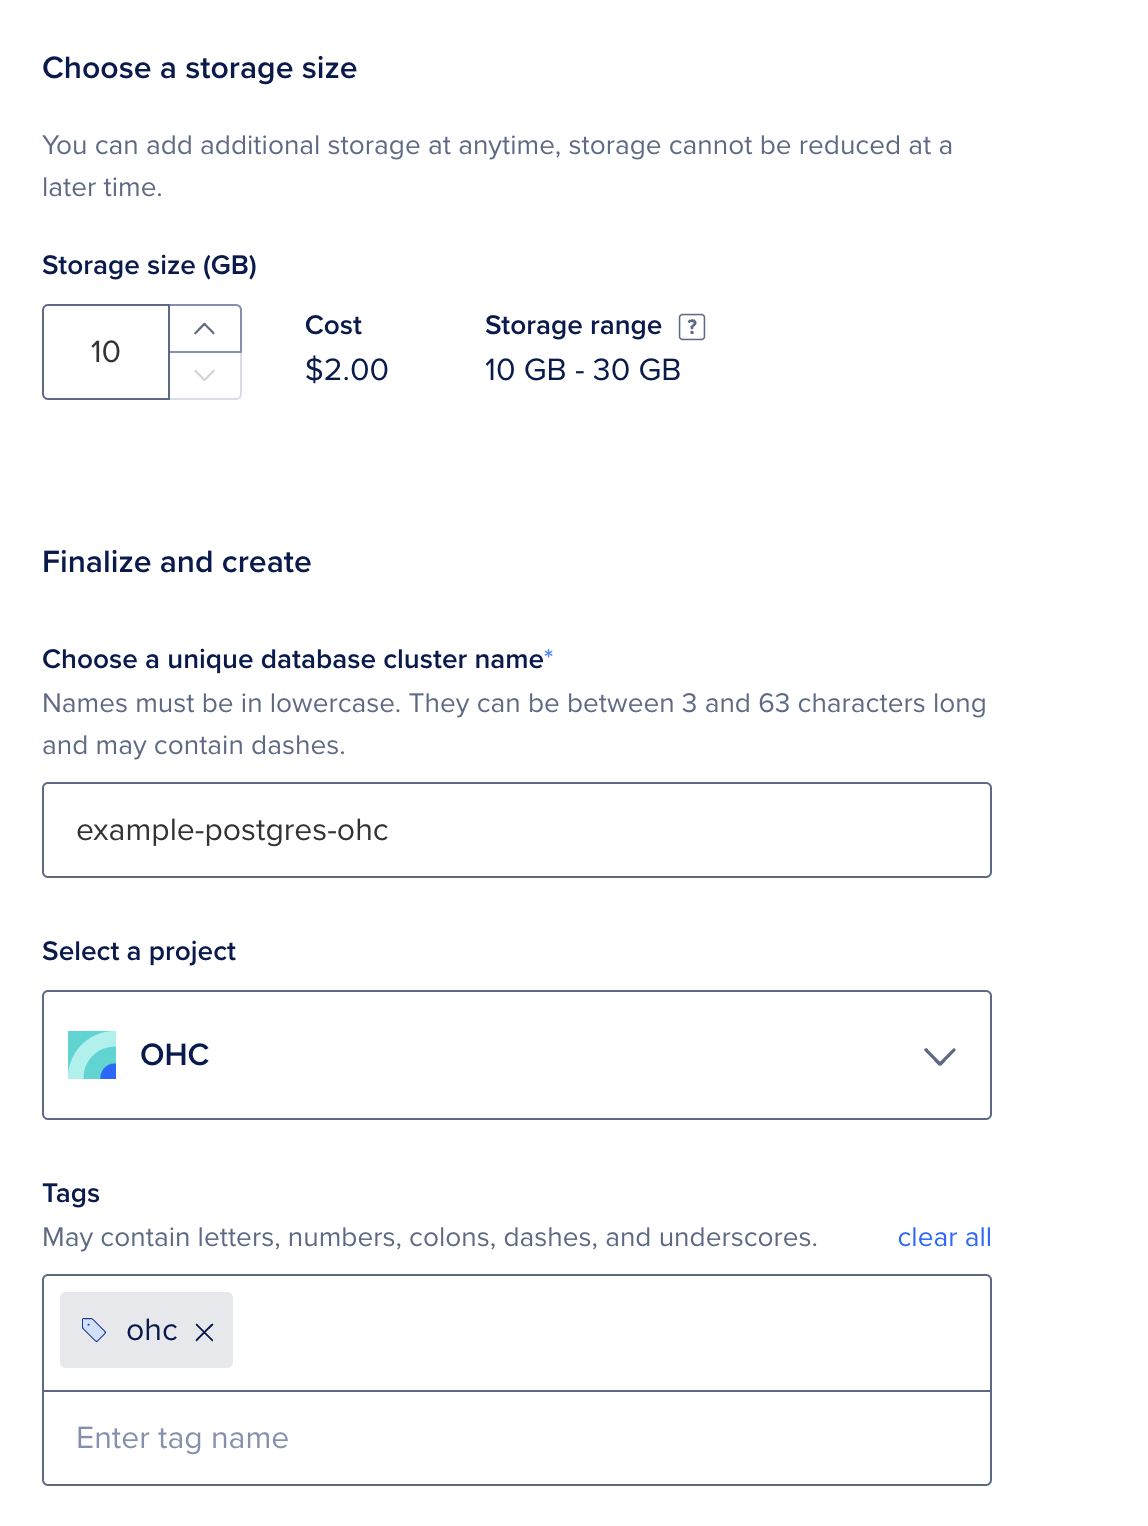
- Name: Give your database a unique name.
- Tags: Add tags for organization.
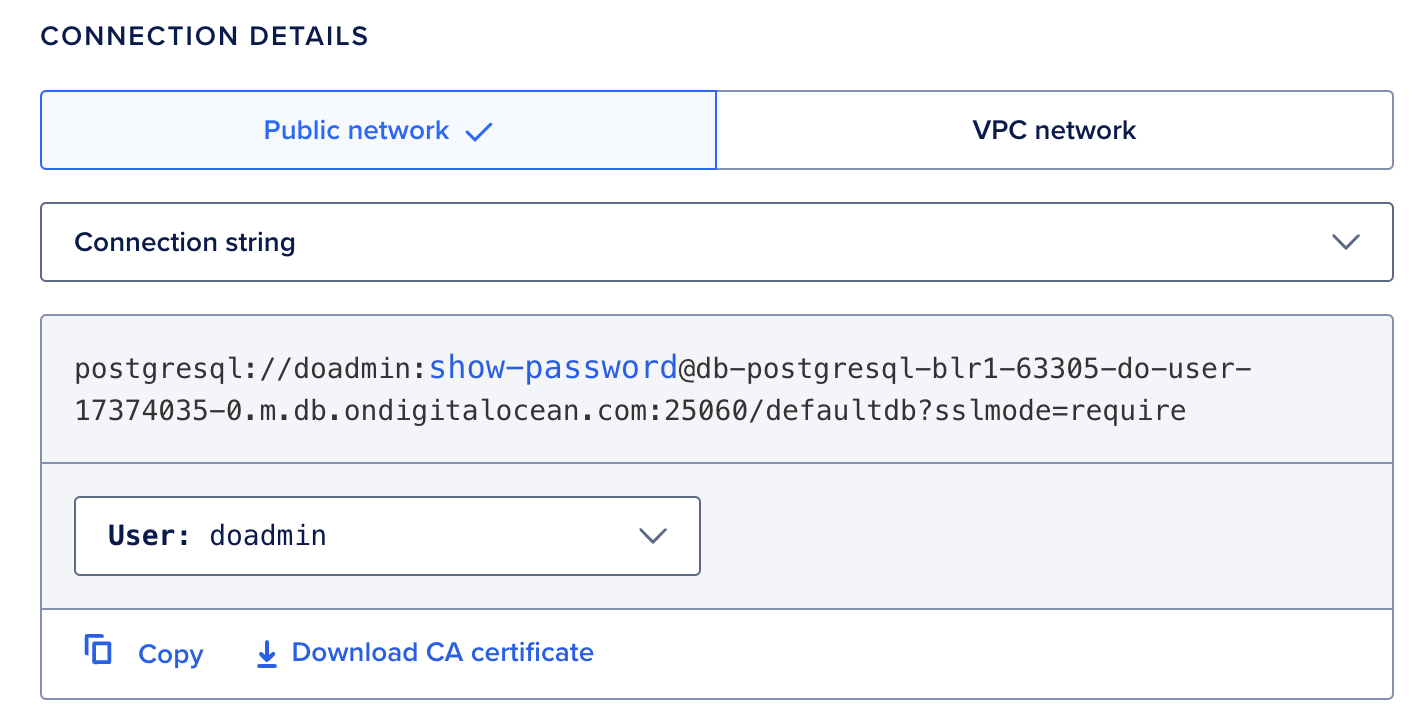
1.3 Save Connection Details
-
Once the database is created, note the connection URL for later use.
Step 2: Set Up Object Storage (Spaces)
2.1 Navigate to Spaces
- Go to the Spaces section in DigitalOcean.
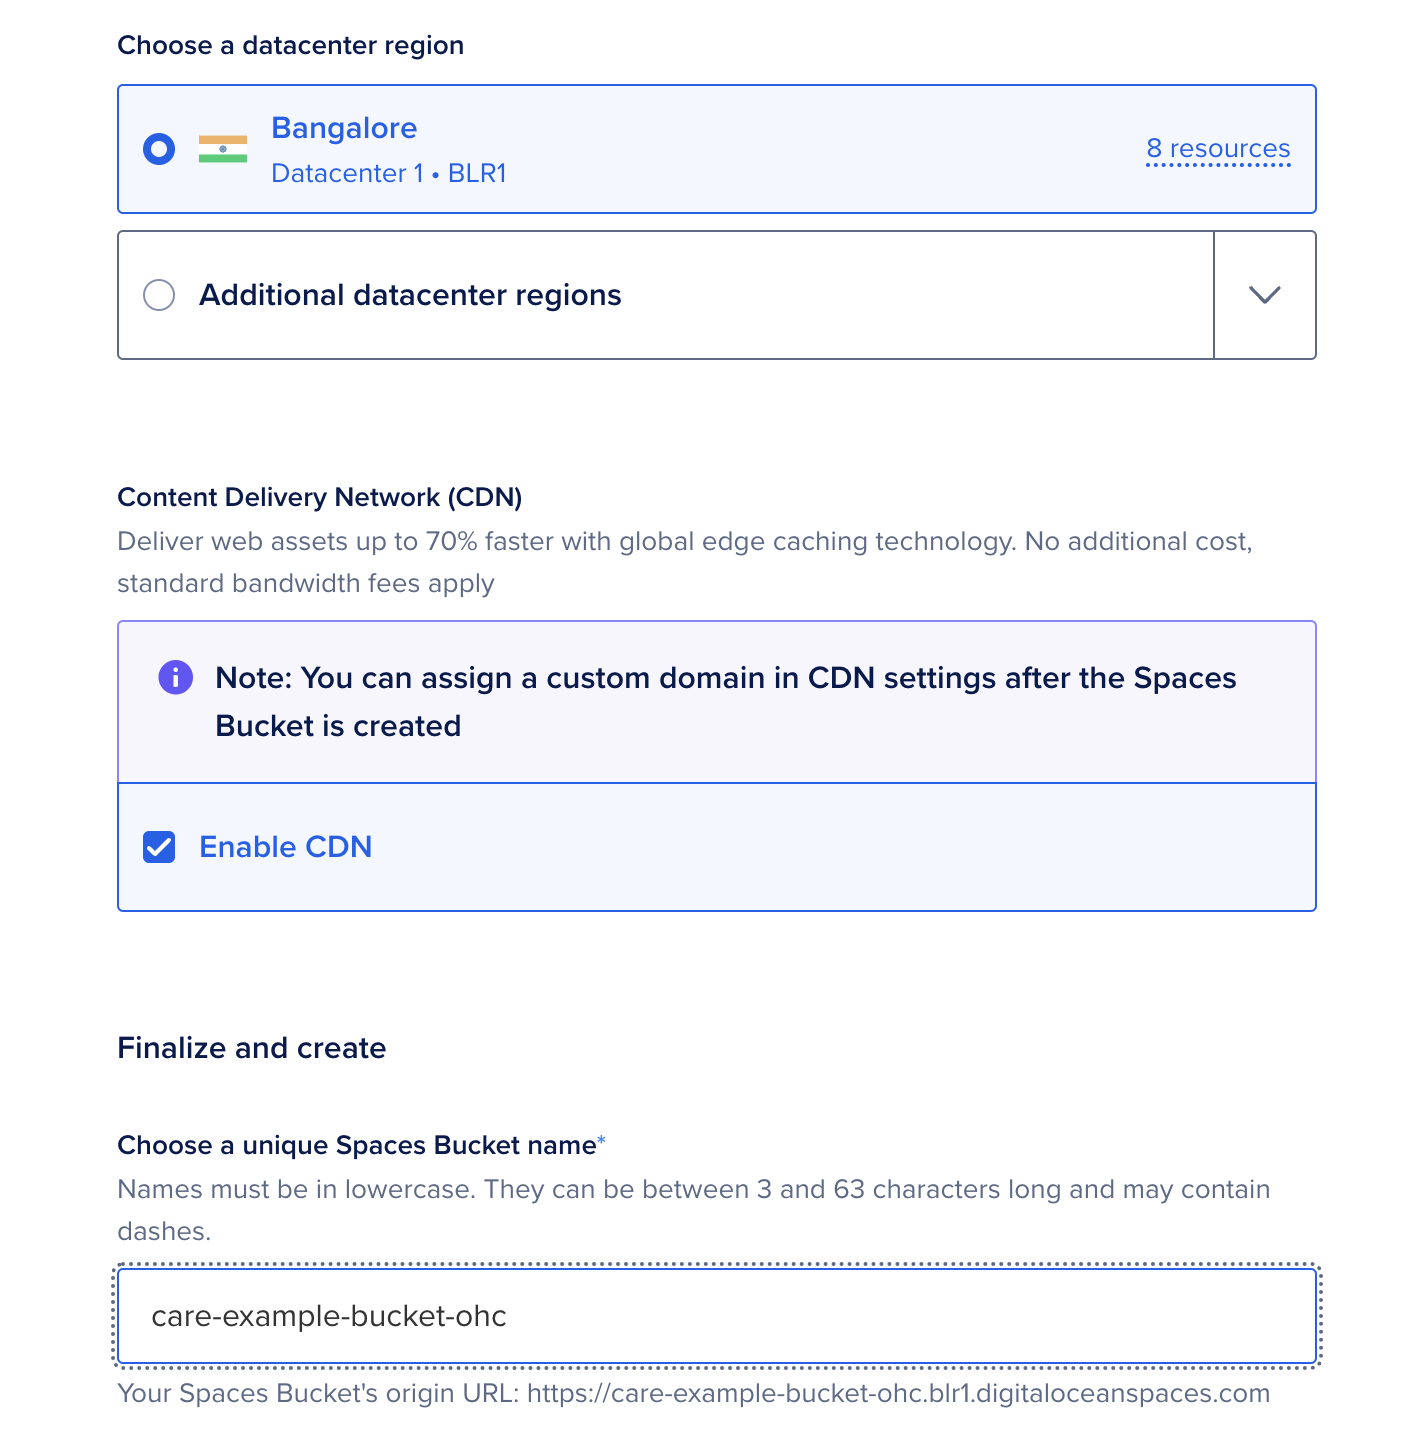
2.2 Create a New Space
-
Click Create a Space.

-
Choose:
- Region: Select the same region as your database.
- Enable CDN: For faster file delivery.
- Bucket Name: Enter a unique name.
- Project: Select the default project.
- Create: Click to create the space.
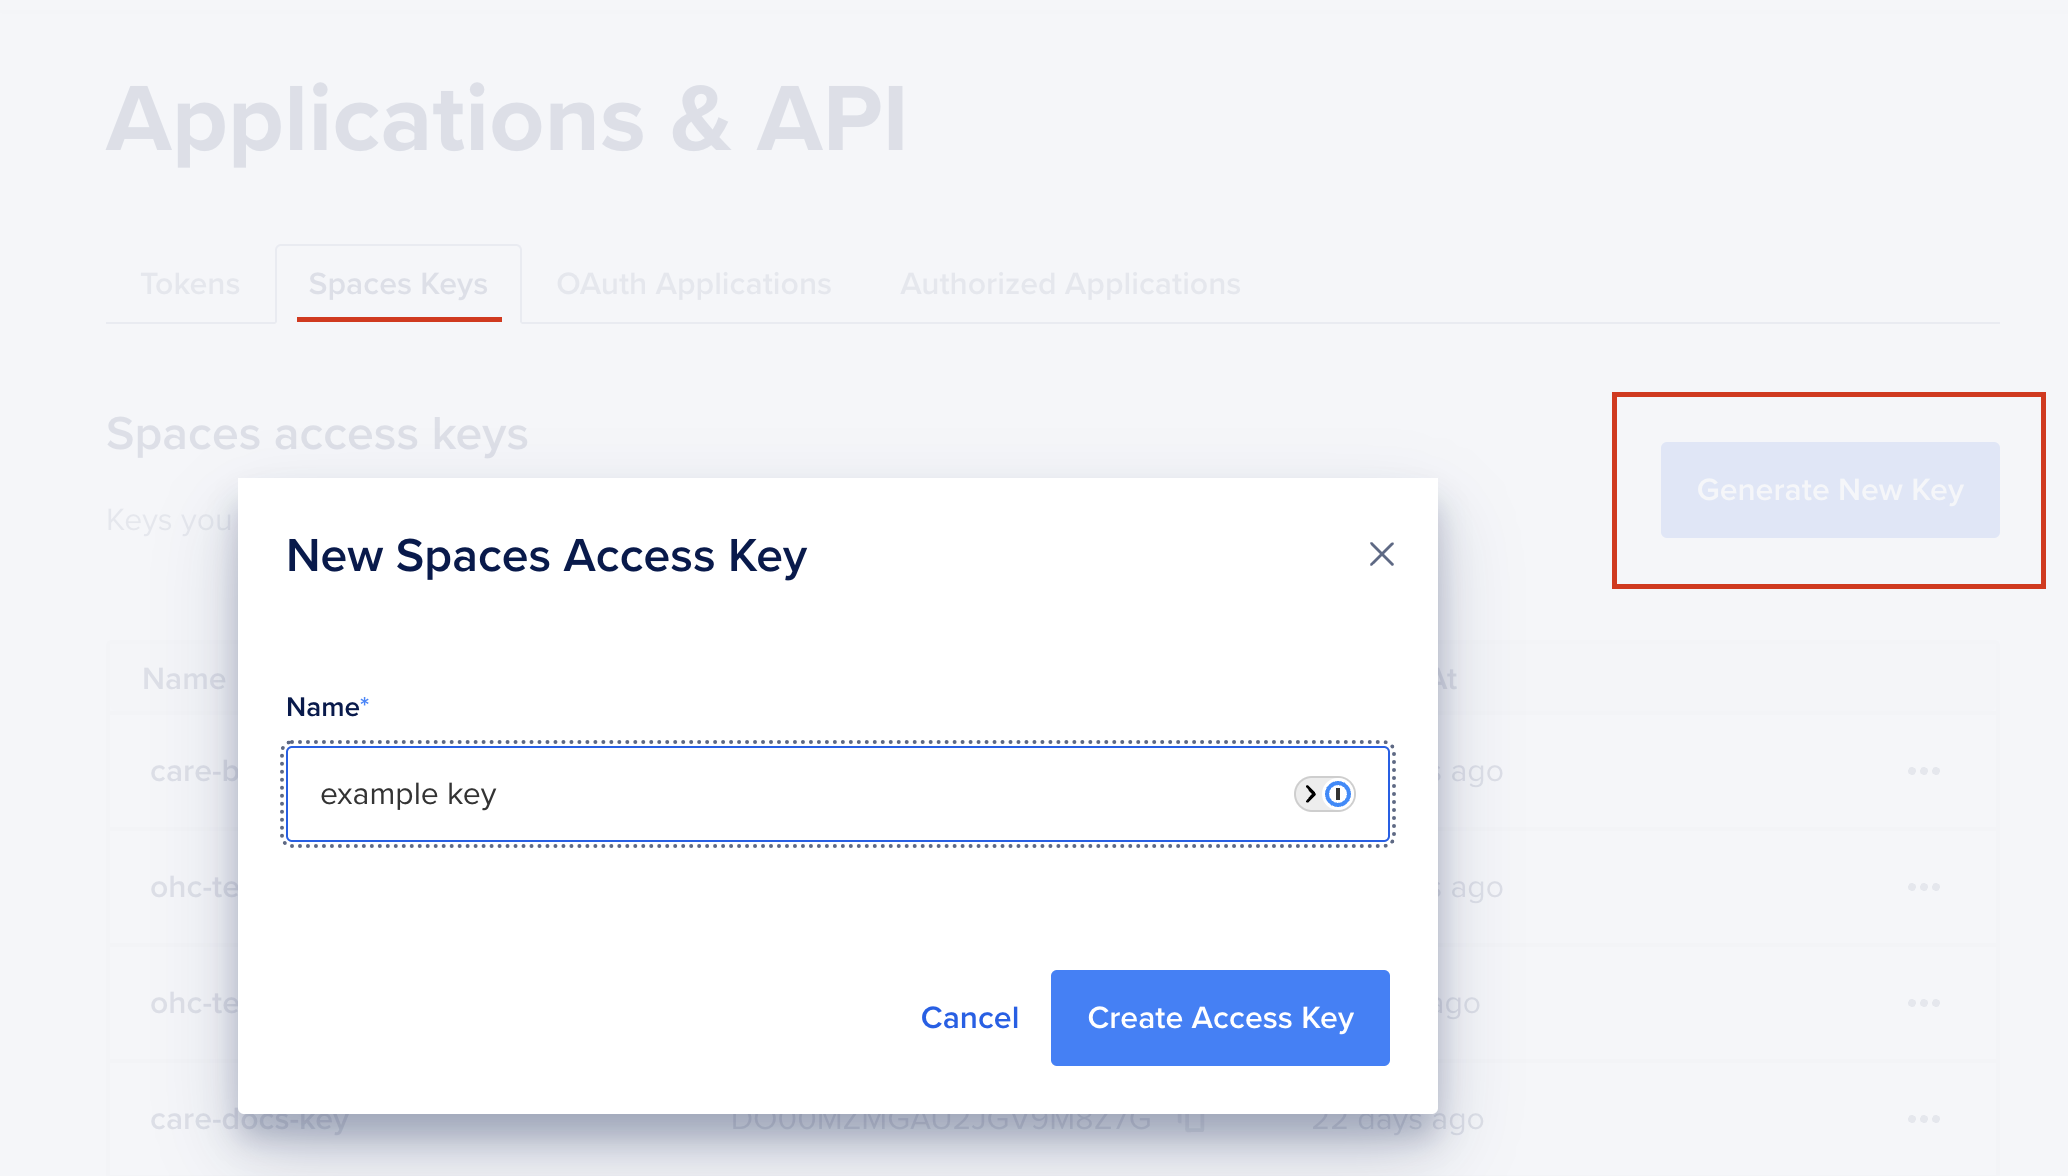
2.3 Generate API Keys
-
Go to the API tab and click Spaces Keys.
-
Create a new key pair and save the Key and Secret.
Step 3: Deploy the Care Backend (BE)
Step 3.1: Deploy Redis
3.1.1 Set Up Redis
-
Go to the App Platform and click Create App.

-
Choose Docker Hub as the source and use:
- Repository:
redis/redis-stack-server. - Tag:
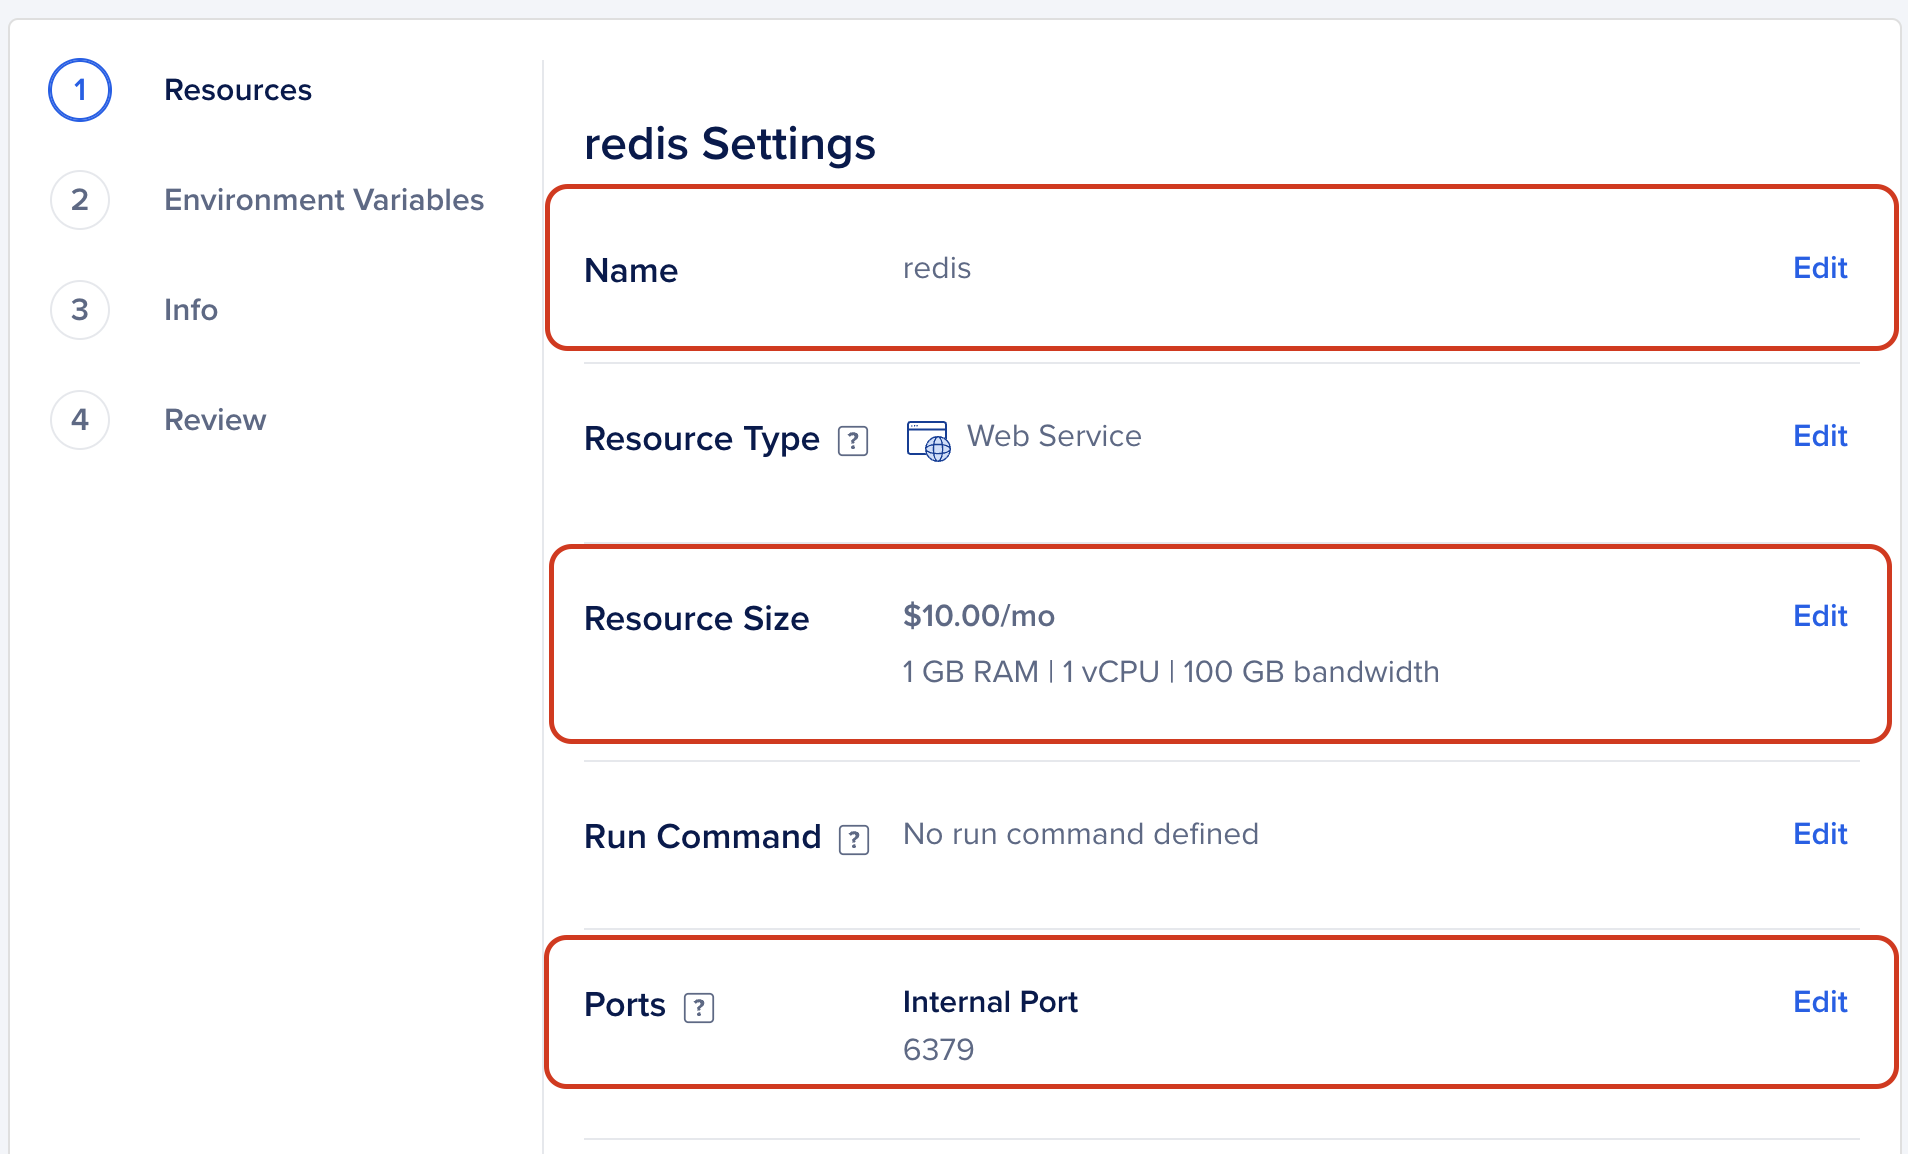
6.2.6-v10. - Port: Expose
6379as an internal port.
- Repository:
-
Name the component
redis.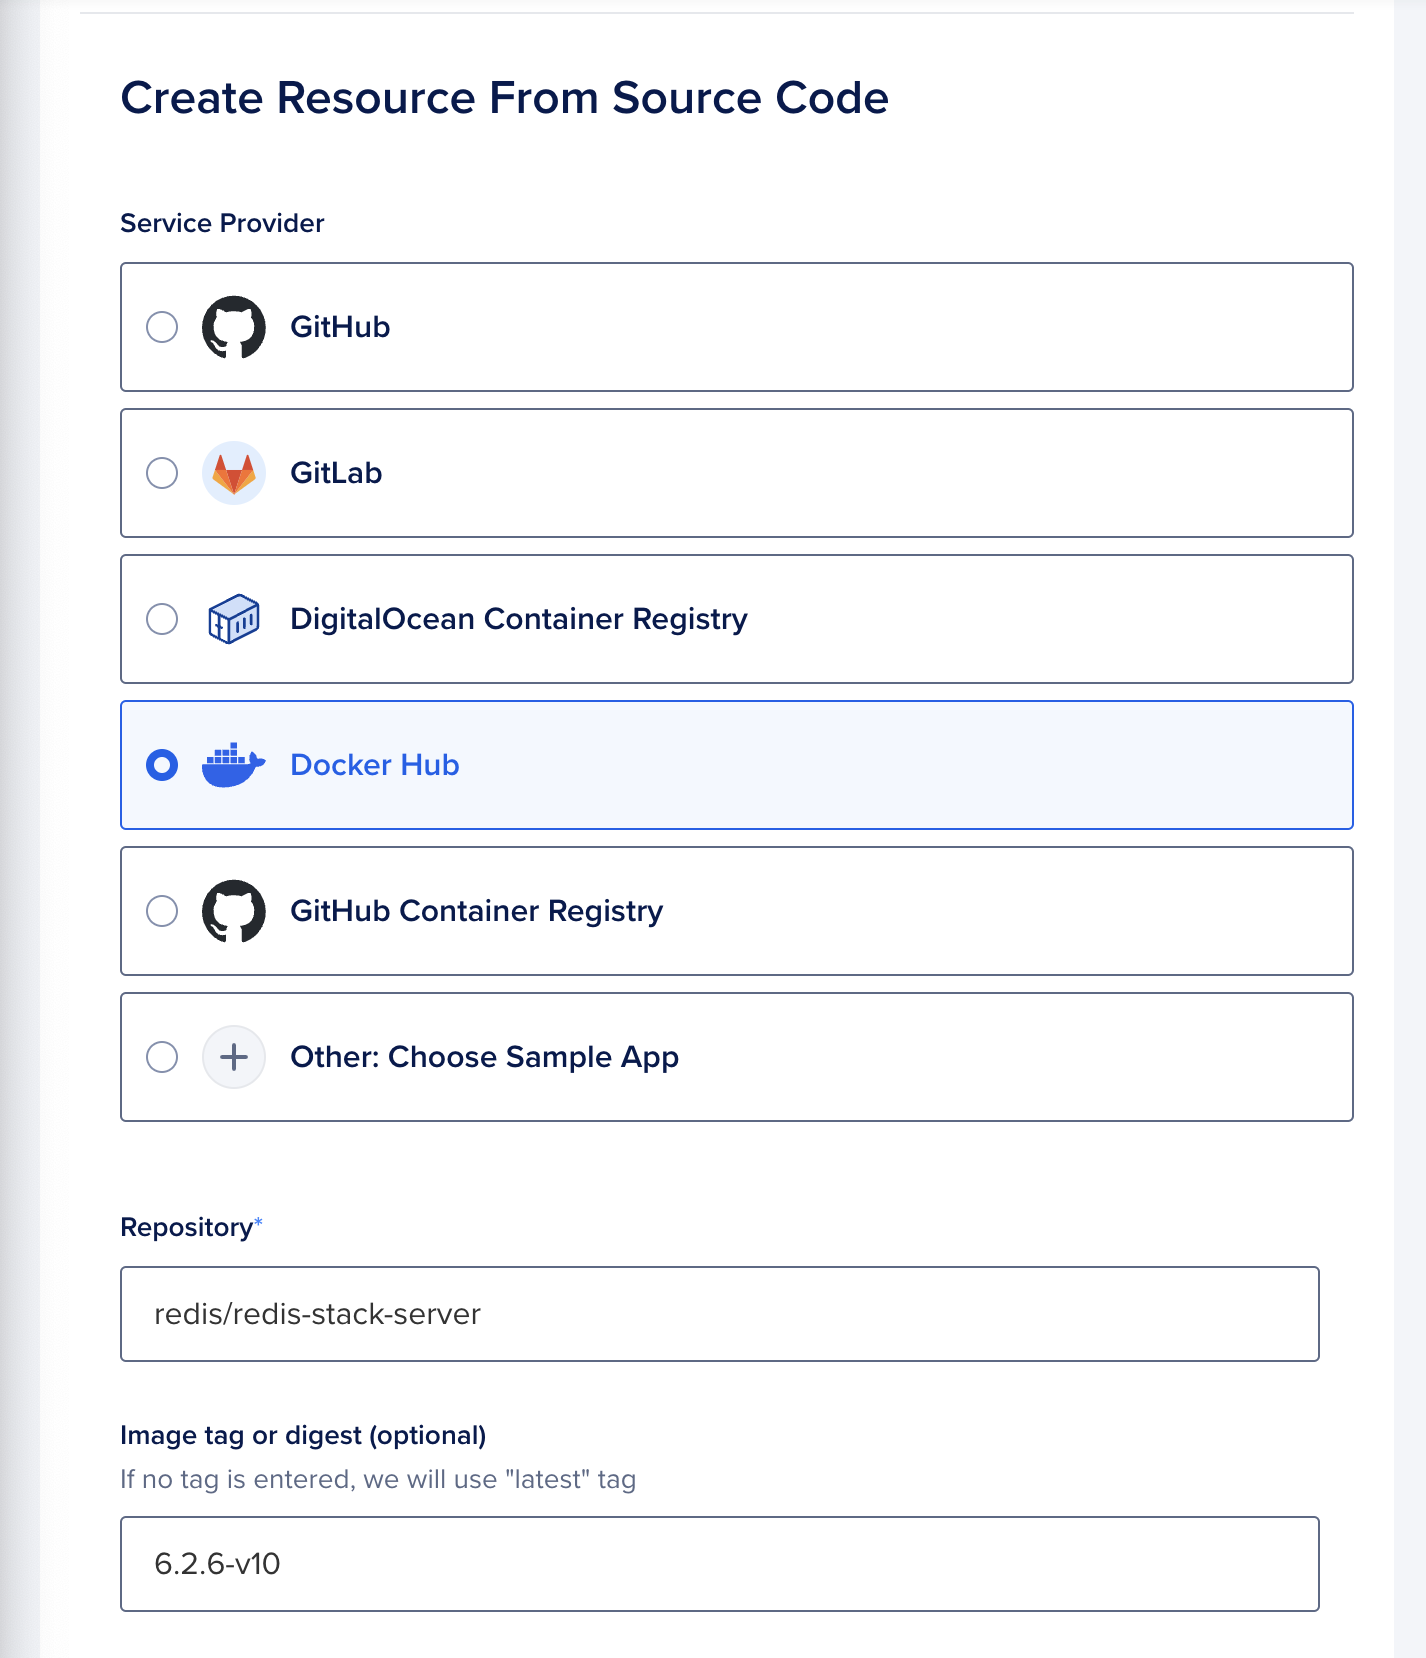
3.1.2 Name and Deploy
-
Name the App
care-backendand deploy it.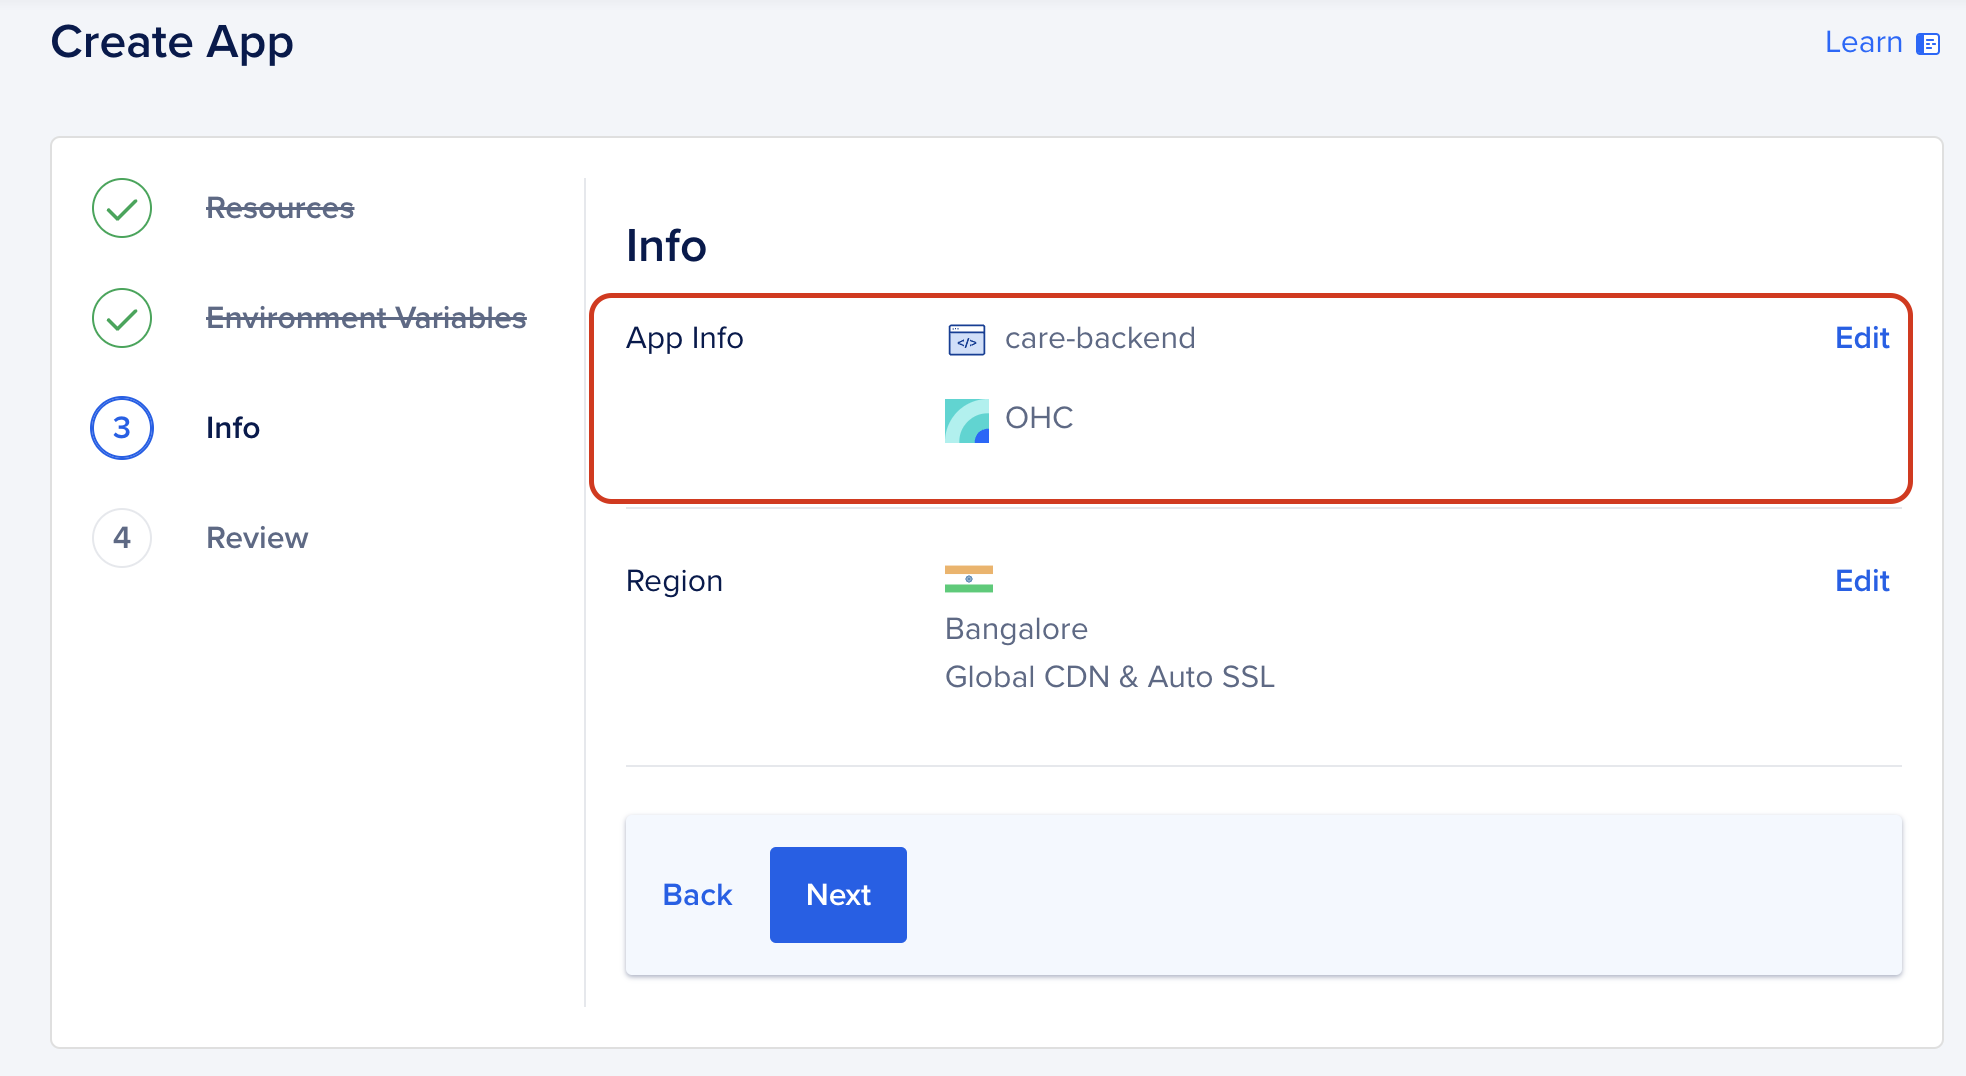
Step 3.2: Deploy the Care Backend
3.2.1 Fork and Clone the Repository
- Fork the Care Backend Repository.
- Use the
productionbranch for deployment.
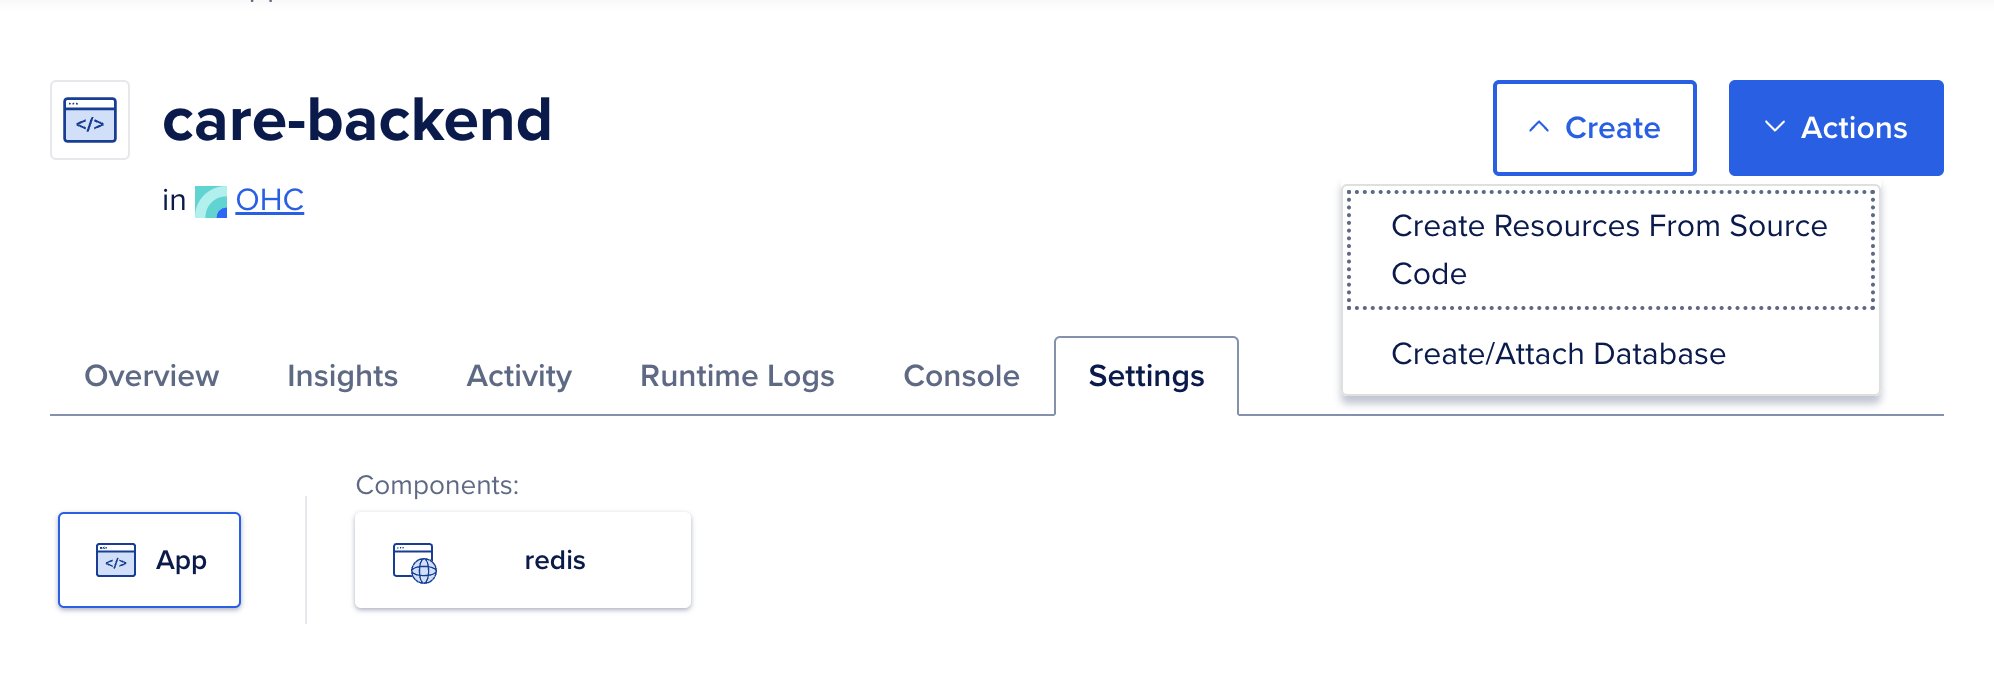
3.2.2 Set Up the App
-
Click Create App and choose From Source Code.
-
Select your forked repo and branch.
-
Set the build and run commands:
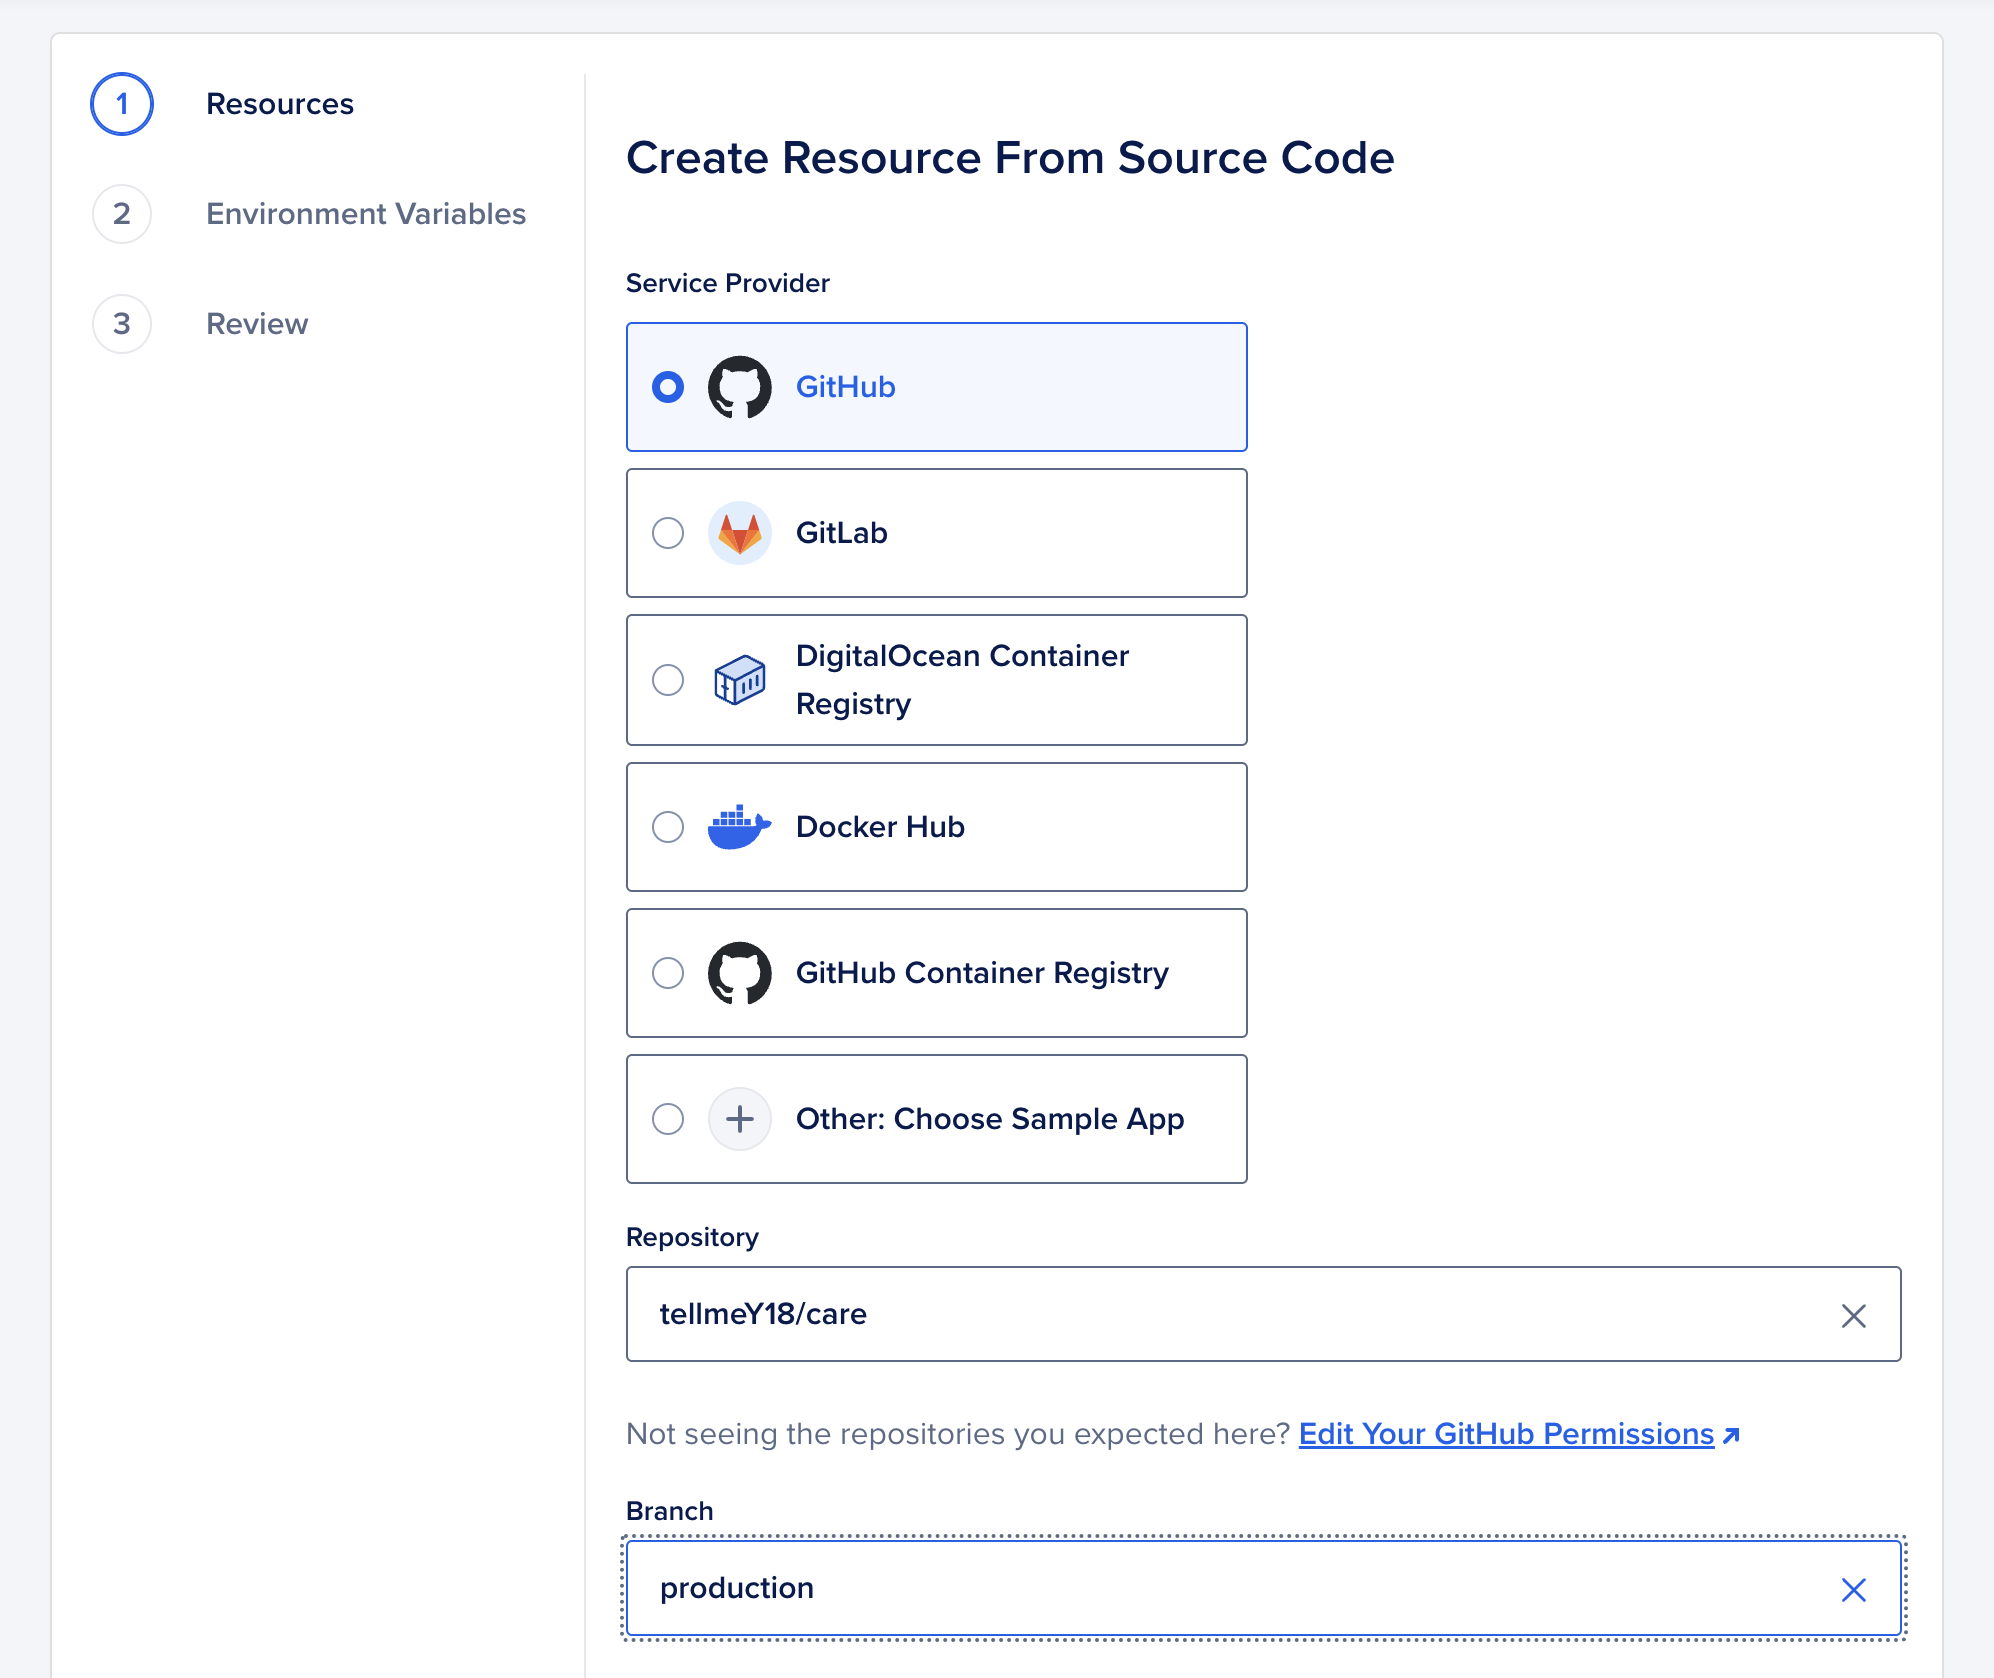
-
Build Command:
python install_plugins.py && python manage.py collectstatic --noinput && python manage.py compilemessages -
Run Command:
gunicorn config.wsgi:application --workers 2 --bind :9000
-
3.2.3 Environment Variables
Add the following as global environment variables:
DJANGO_SETTINGS_MODULE=config.settings.production
DATABASE_URL=<db-url> # Use the connection URL from Step 1.
REDIS_URL=redis://redis:6379
CORS_ALLOWED_ORIGINS=["https://care.example.com","http://localhost:4000","http://127.0.0.1:4000"]
CELERY_BROKER_URL=redis://redis:6379
REDIS_URL=redis://redis:6379
BUCKET_PROVIDER=DIGITAL_OCEAN
BUCKET_REGION=nyc3 # Use the region of your Spaces.
BUCKET_KEY= # Use the Spaces key.
BUCKET_SECRET= # Use the Spaces secret.
BUCKET_HAS_FINE_ACL=true
FILE_UPLOAD_BUCKET=example-space-ohc # Use the name of your Space.
FILE_UPLOAD_BUCKET_ENDPOINT=https://example-space-ohc.nyc3.digitaloceanspaces.com
FACILITY_S3_BUCKET=example-space-ohc # Use the name of your Space.
FACILITY_S3_BUCKET_ENDPOINT=https://example-space-ohc.nyc3.digitaloceanspaces.com
JWKS_BASE64= # Add your JWKS key. (Refer to the next section to create one.)
DISABLE_COLLECTSTATIC=1
Generate JWKS Key
Generating JWKS...
3.2.4 Expose Ports
- Expose port
9000for public HTTP access.
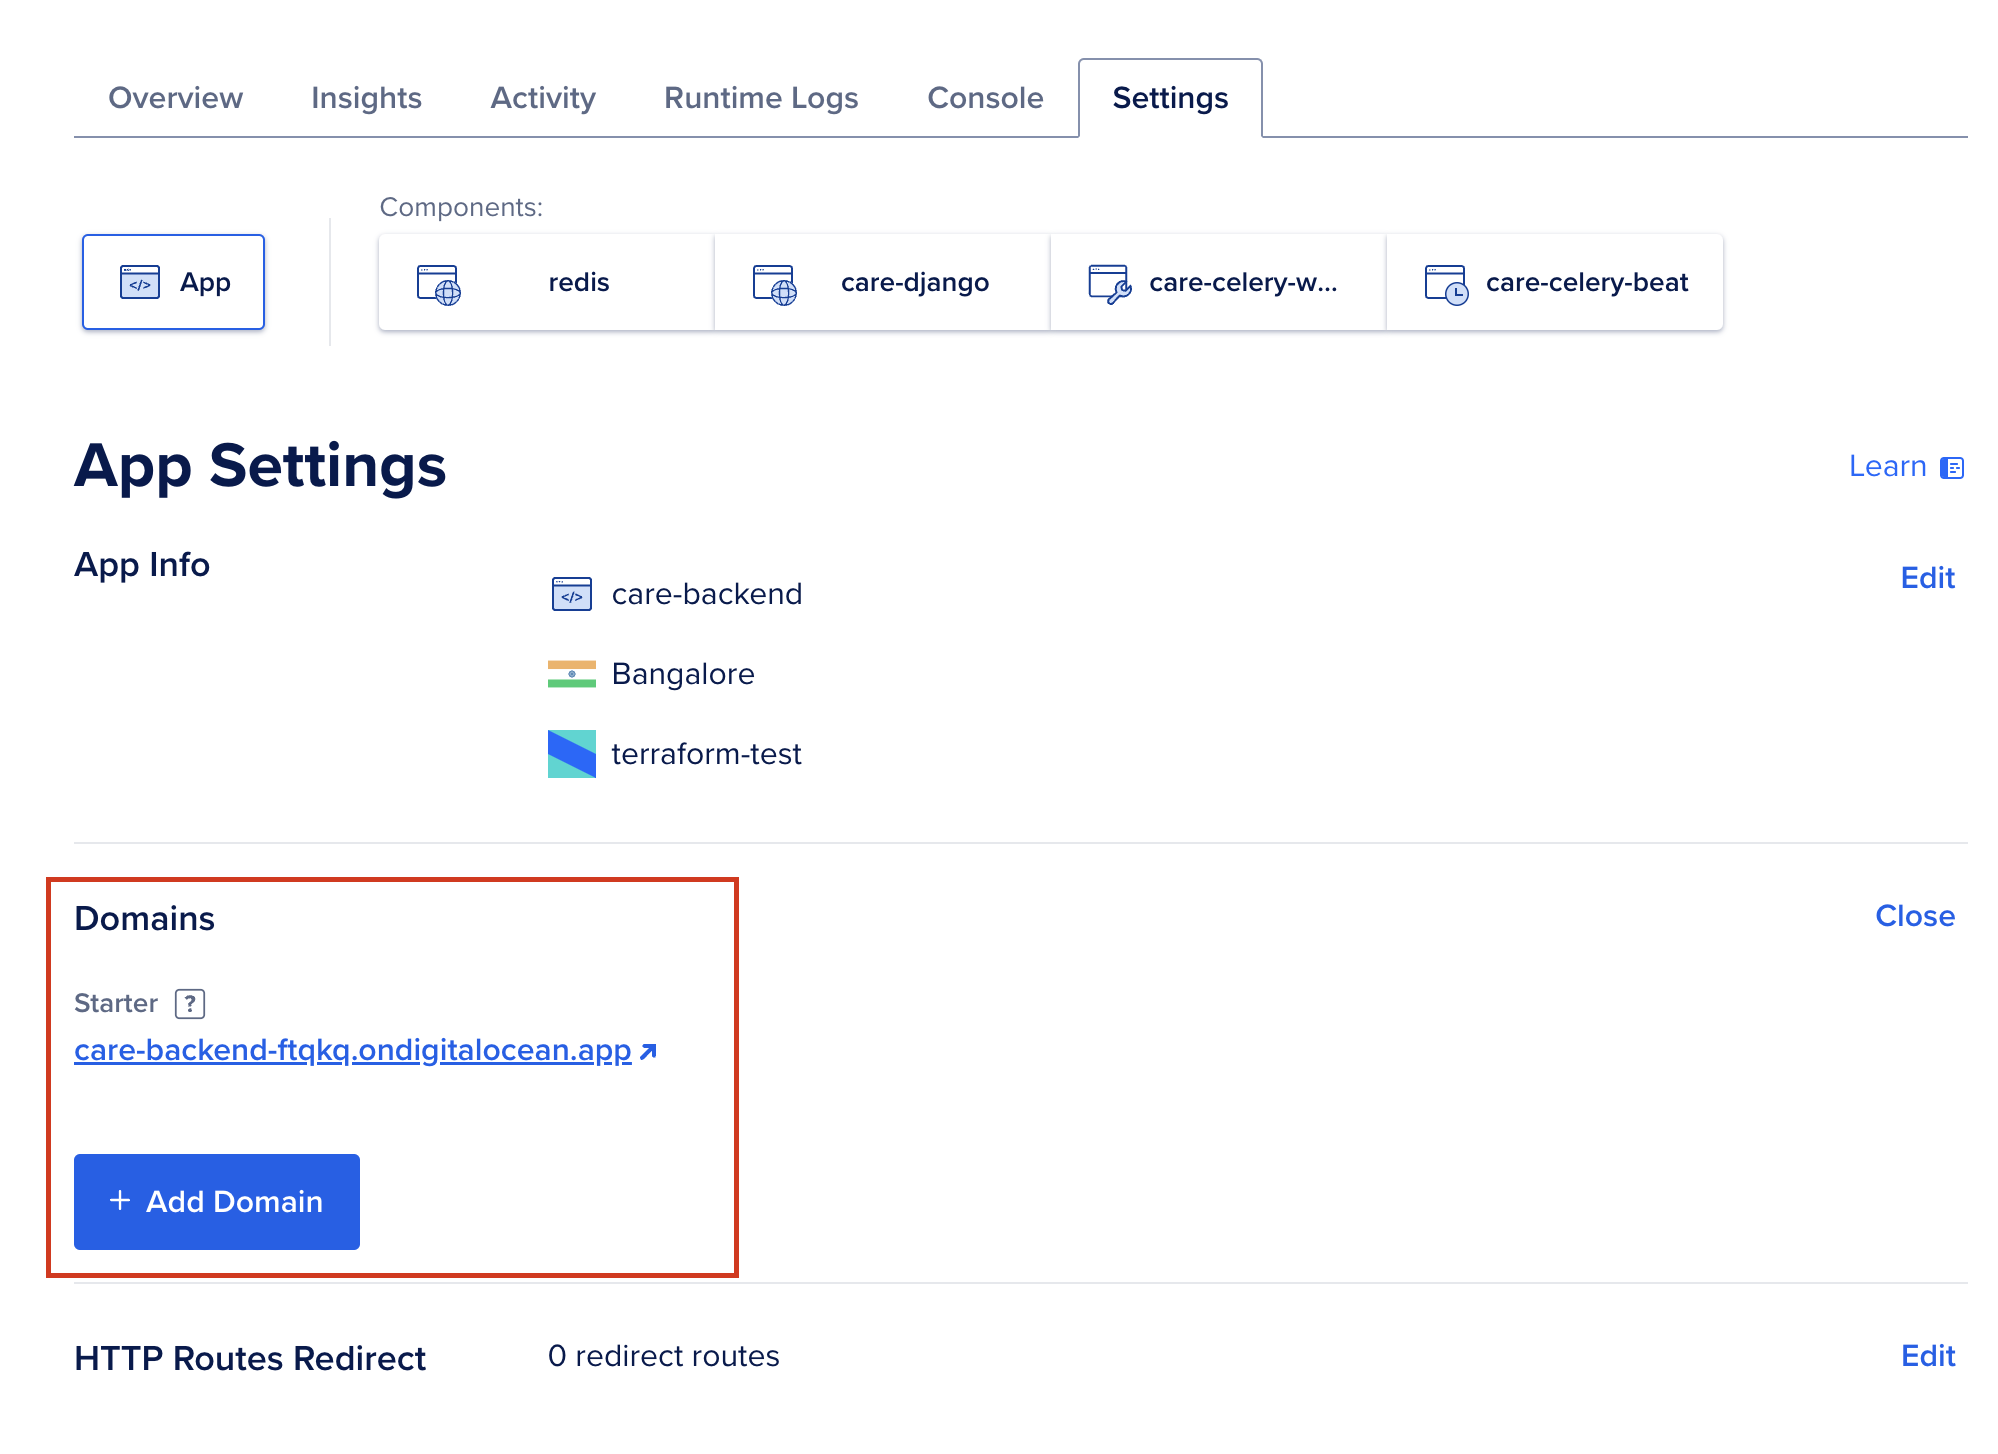
Step 3.3: Add a Domain for the Backend
3.3.1 Configure Domain
-
Go to the app settings and add your domain (e.g.,
care-api.example.com). -
Update your DNS provider with the CNAME record.
Step 3.4: Set Up Celery Worker and Beat
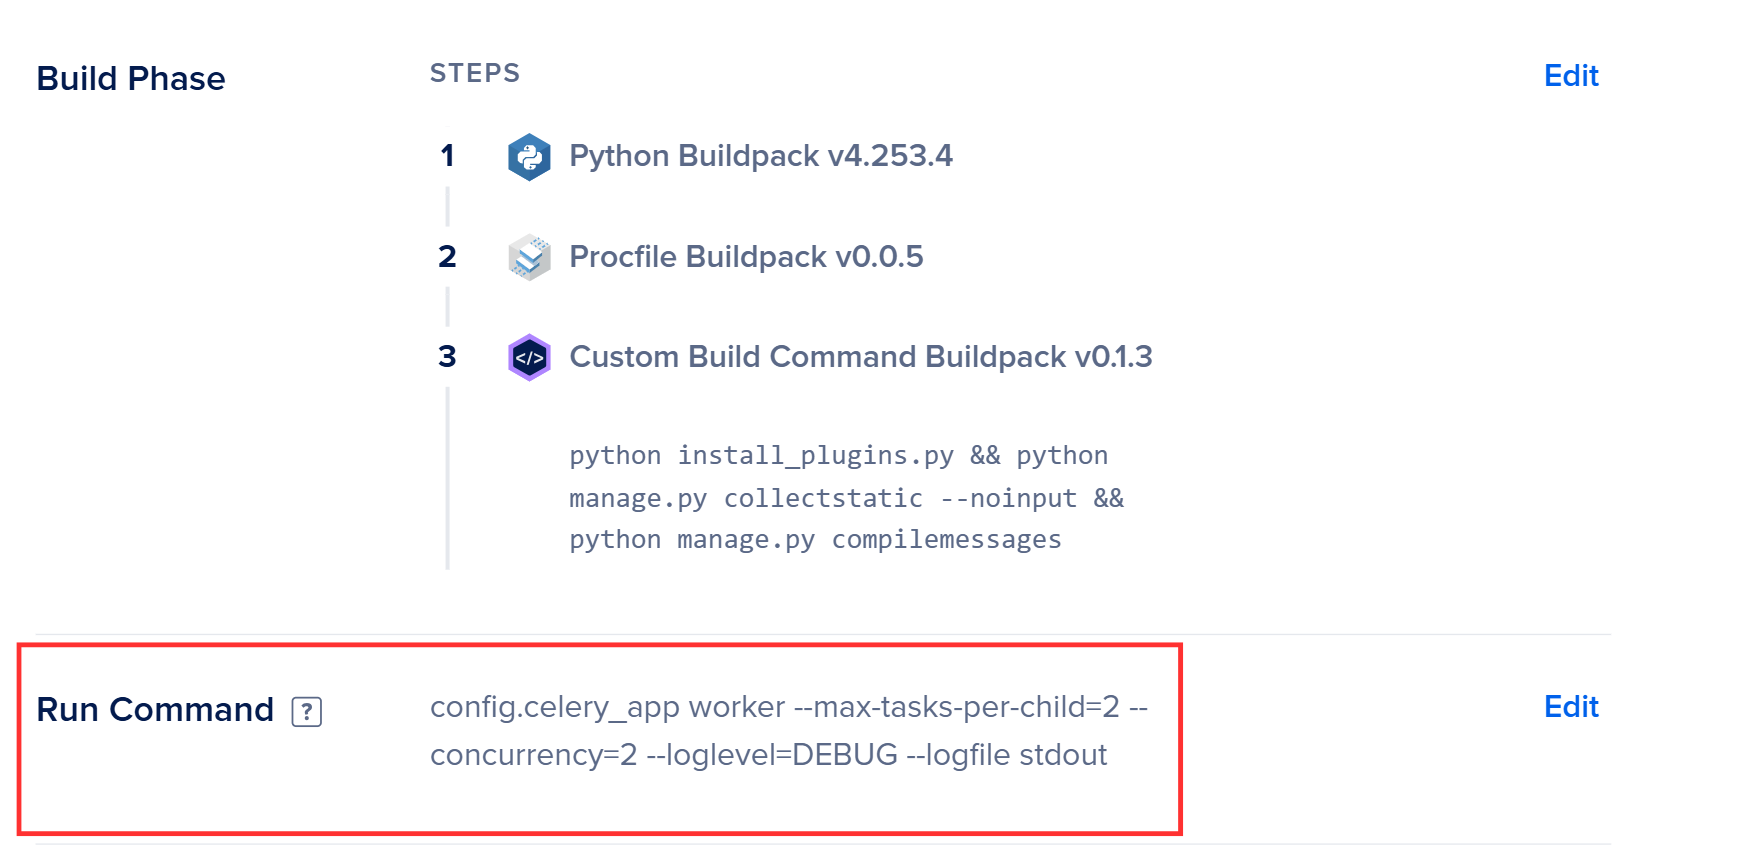
3.4.1 Celery Worker
-
Create a new component in the app.
-
Use the following Run Command:
celery --app=config.celery_app worker --max-tasks-per-child=2 --concurrency=2 --loglevel=DEBUG --logfile stdout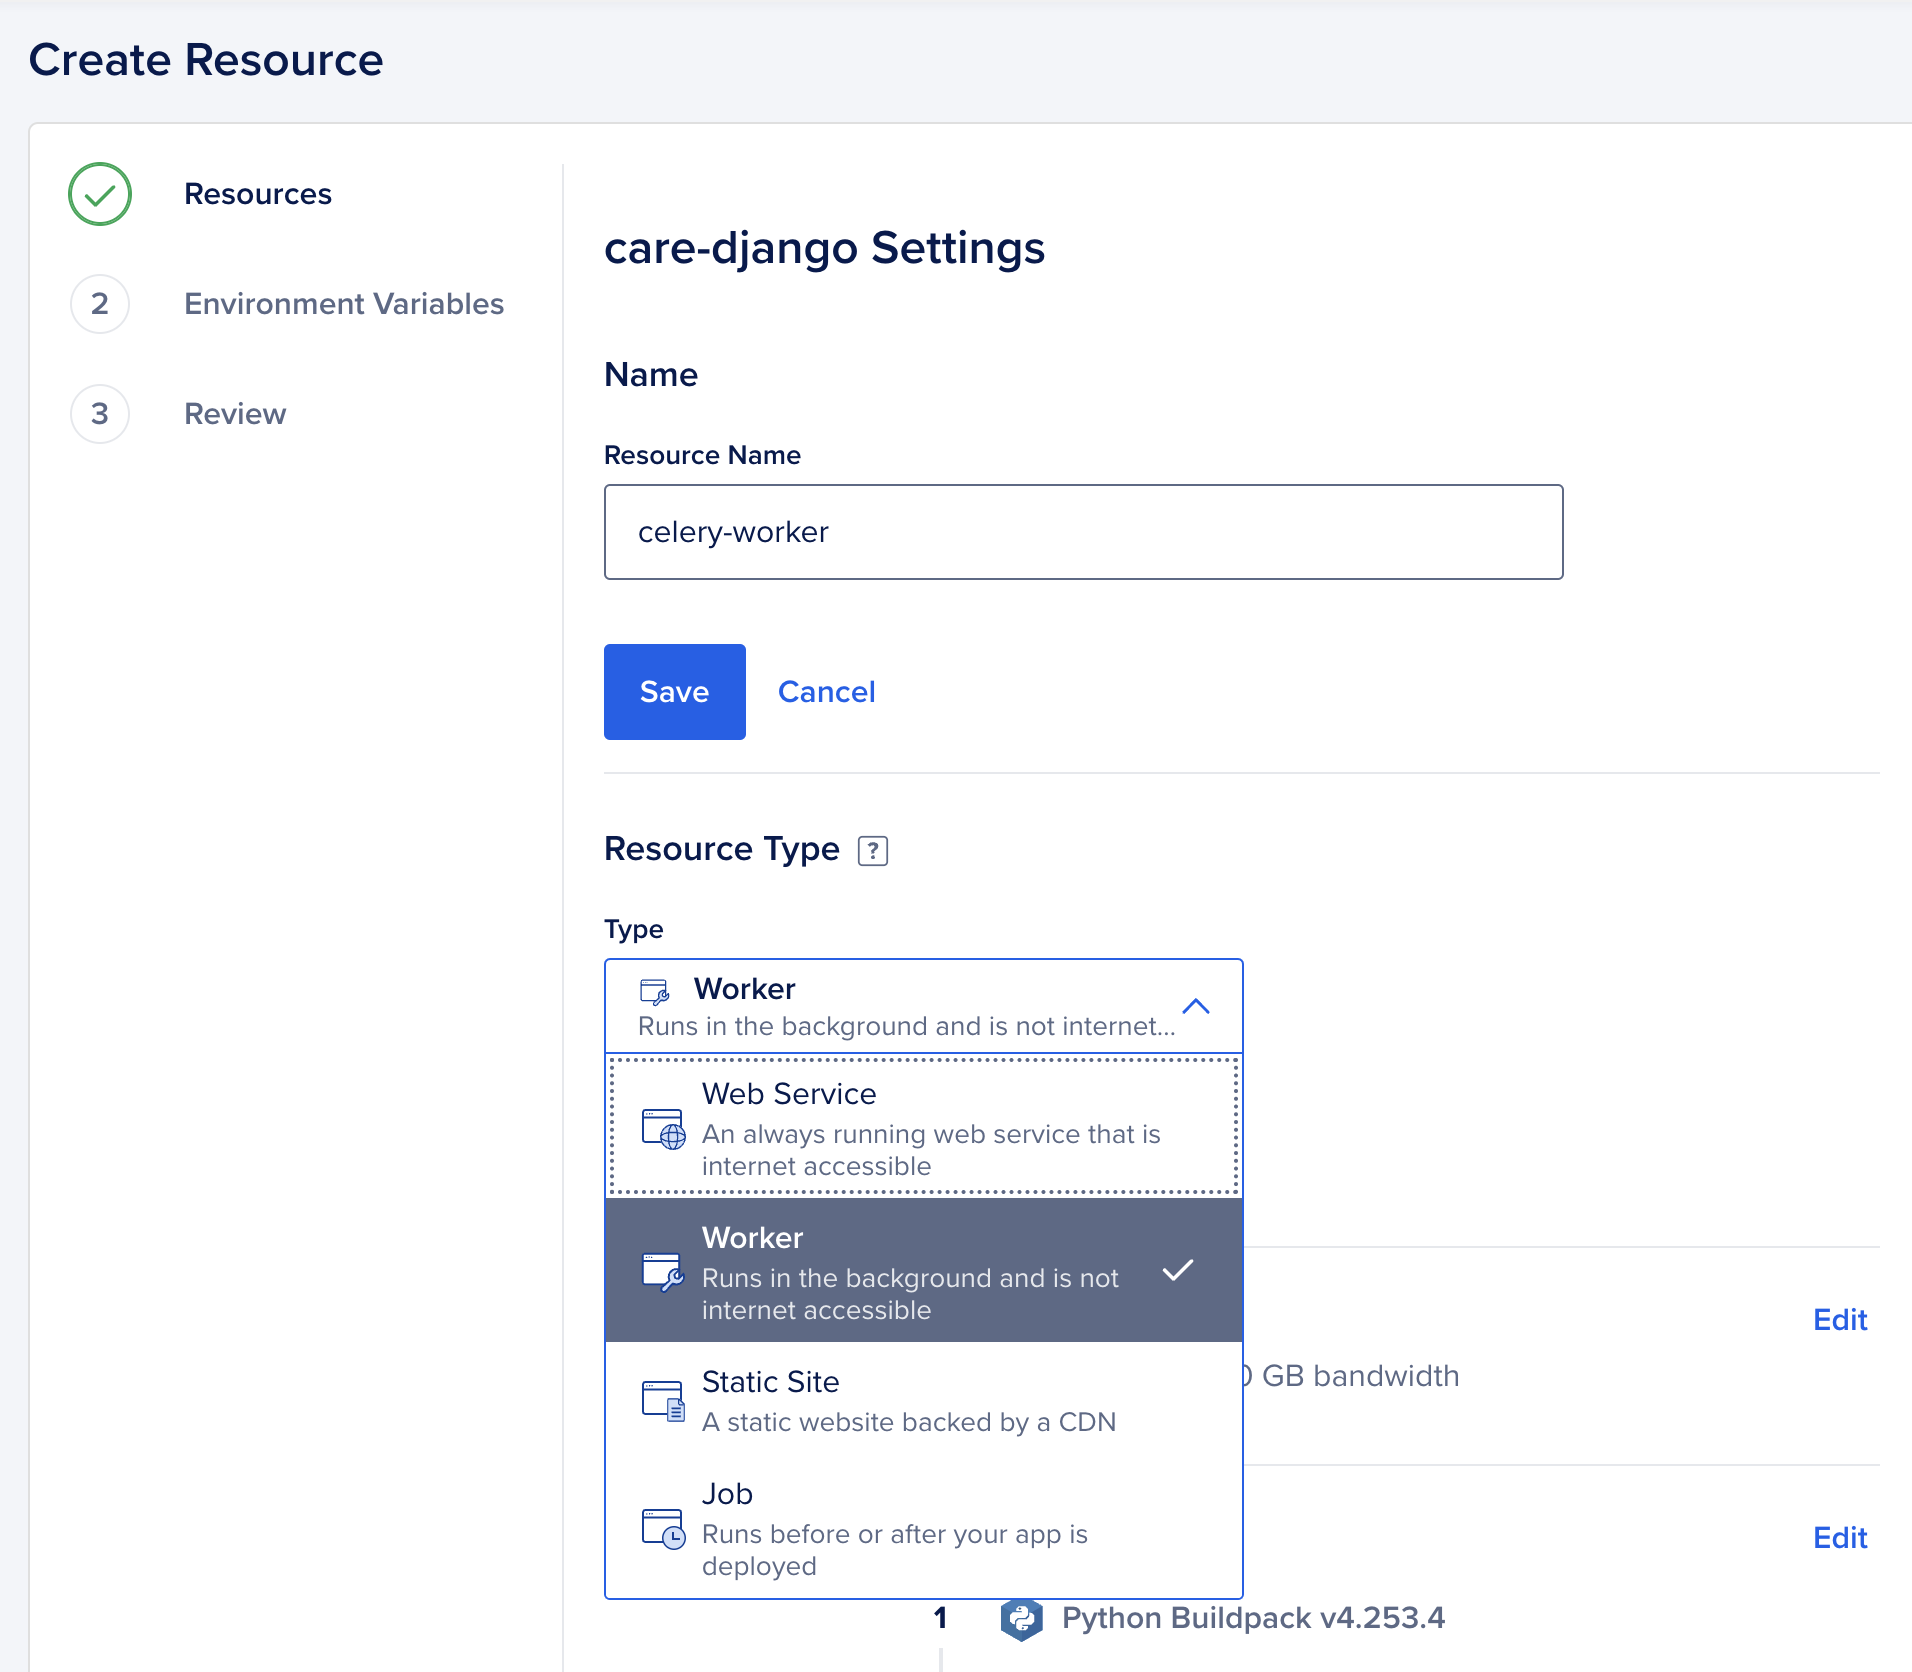
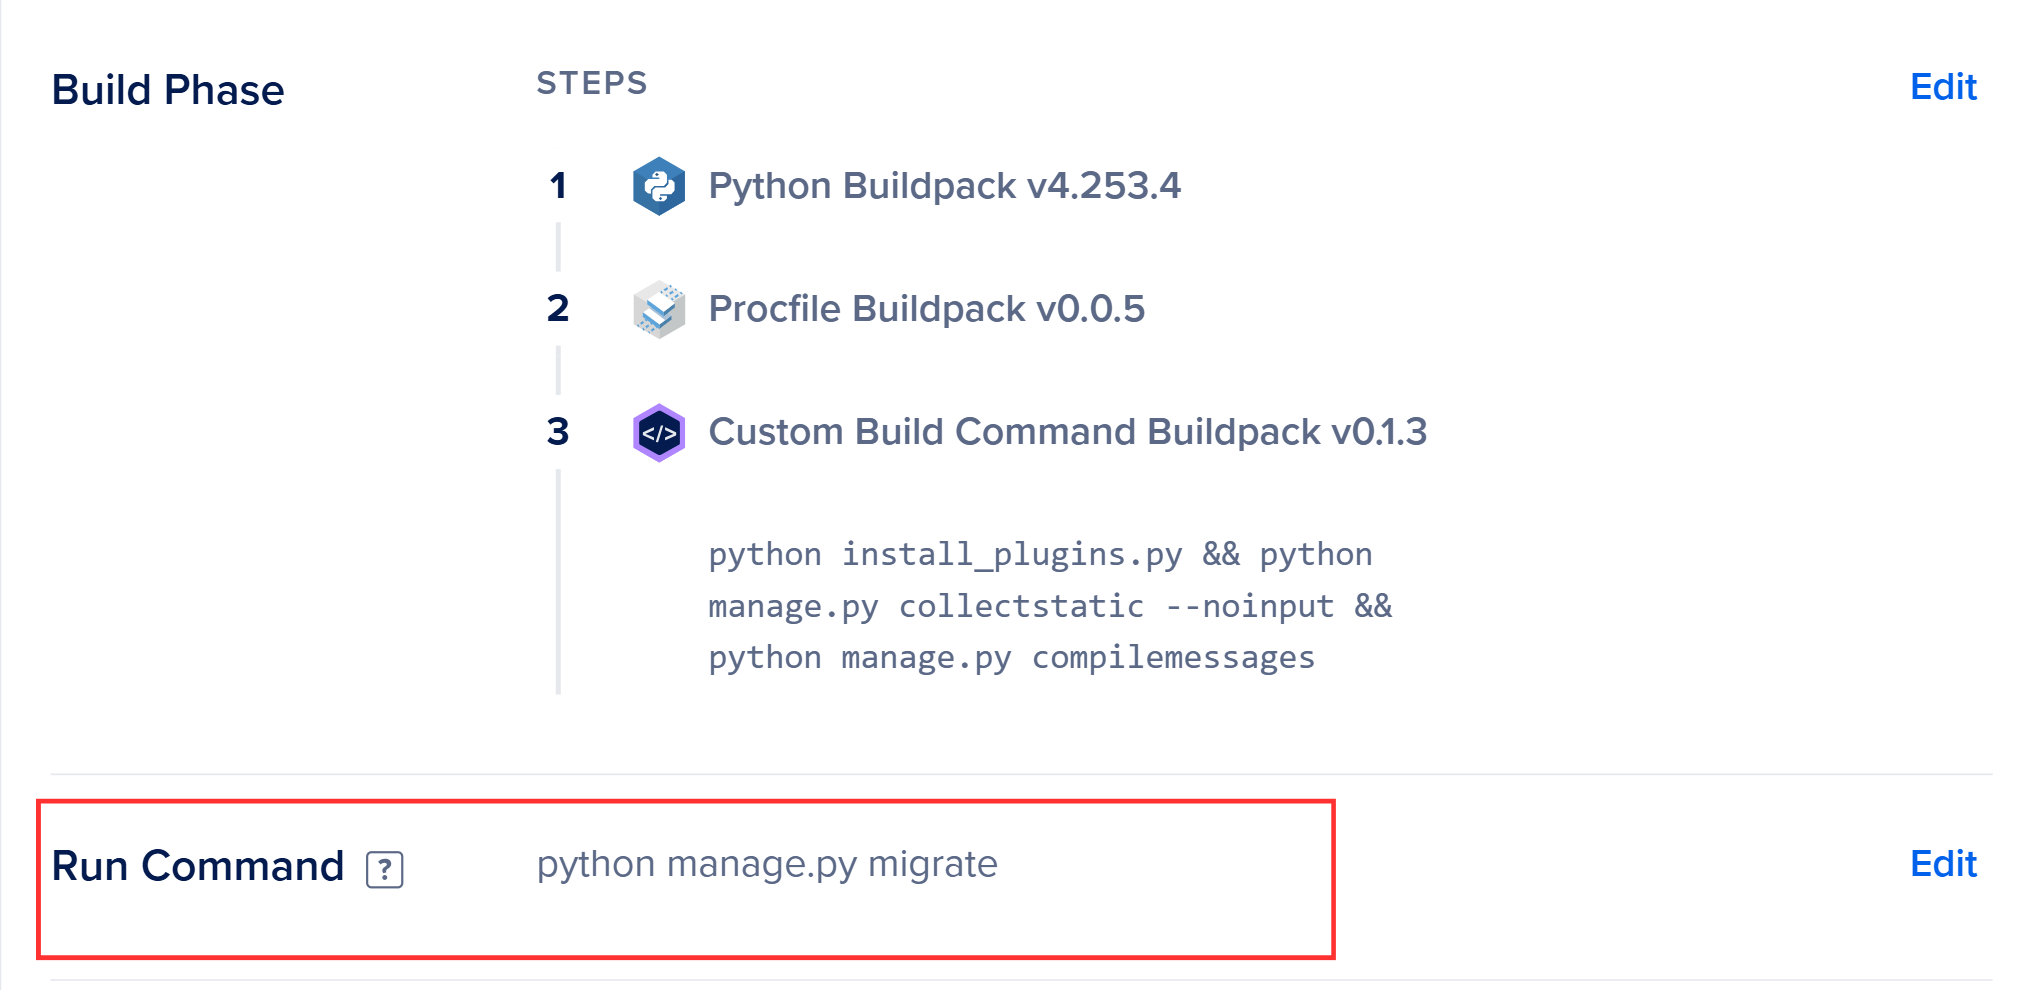
3.4.2 Celery Beat
-
Create another component with the following Run Command:
python manage.py migrate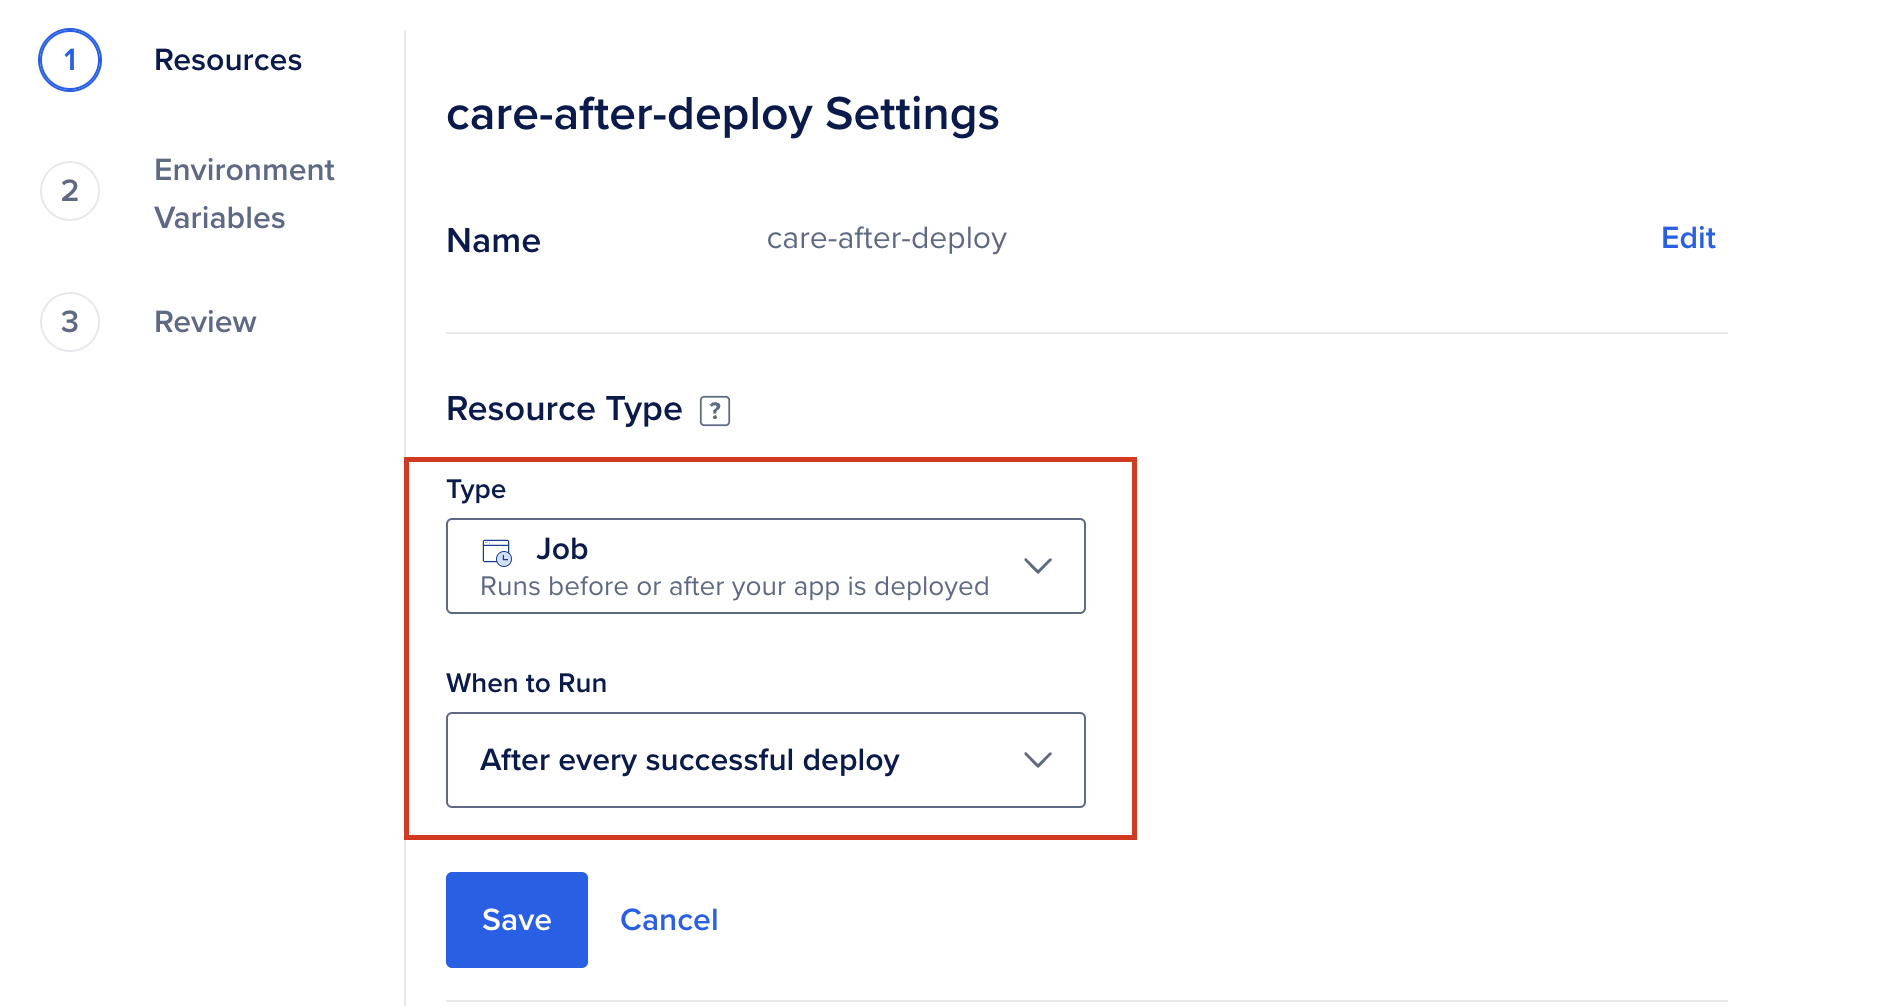
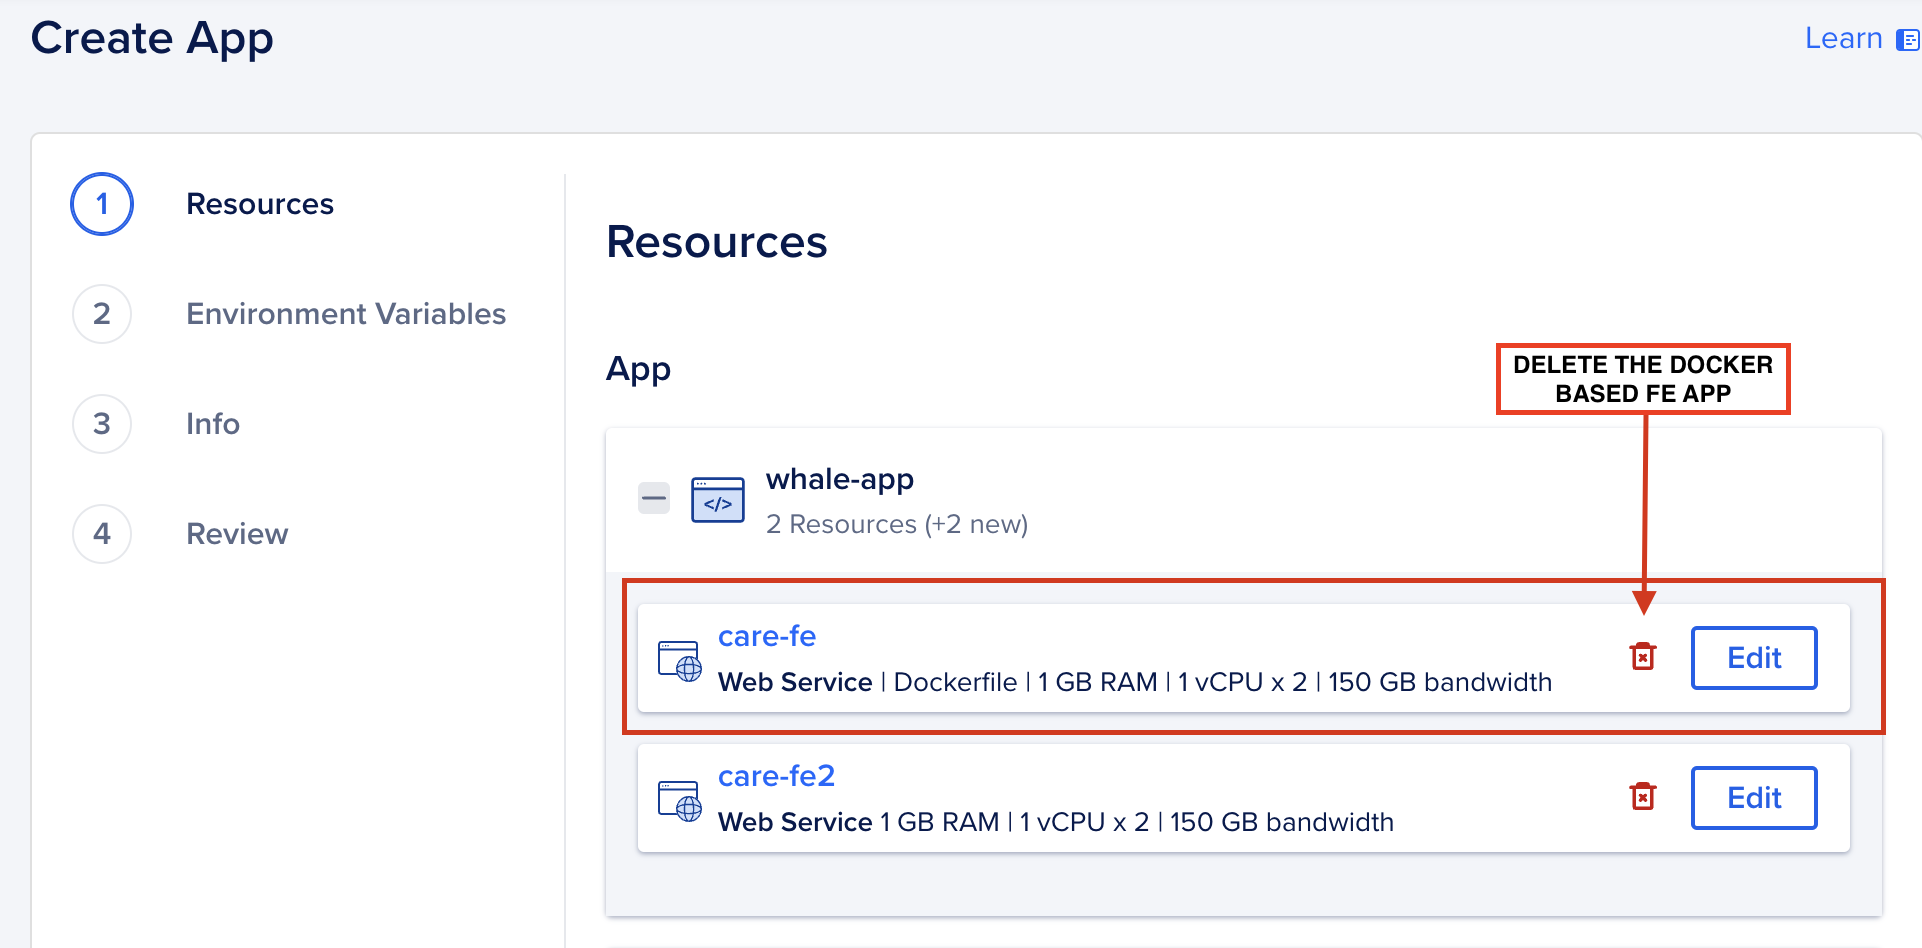
Step 4: Deploy the Care Frontend (FE)
4.1 Fork the Frontend Repository
- Fork the Care Frontend Repository.
- Use the
productionbranch.
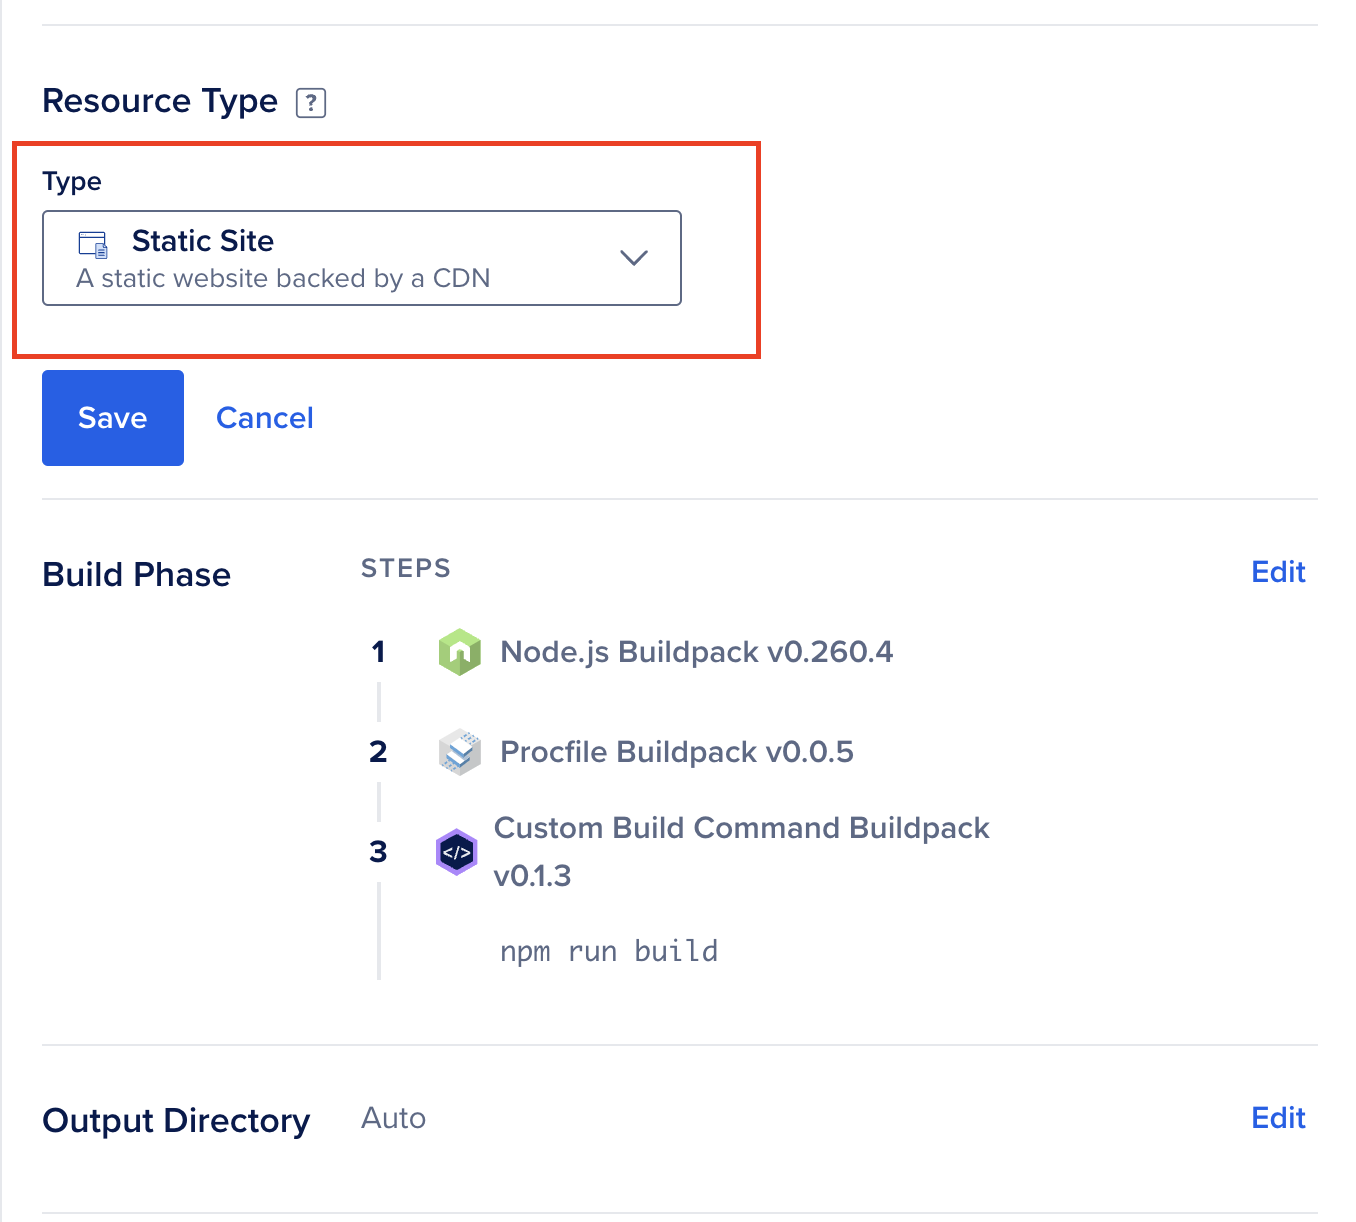
4.2 Set Up the App
-
Click Create App and configure:
-
Type: Static Site.
-
Build Command:
npm run build. -
Environment Variable:
REACT_CARE_API_URL=https://care-api.example.com -
Output Directory: Auto.
-
4.3 Add Domain
-
Go to the app settings and add the frontend domain (e.g.,
care.example.com).
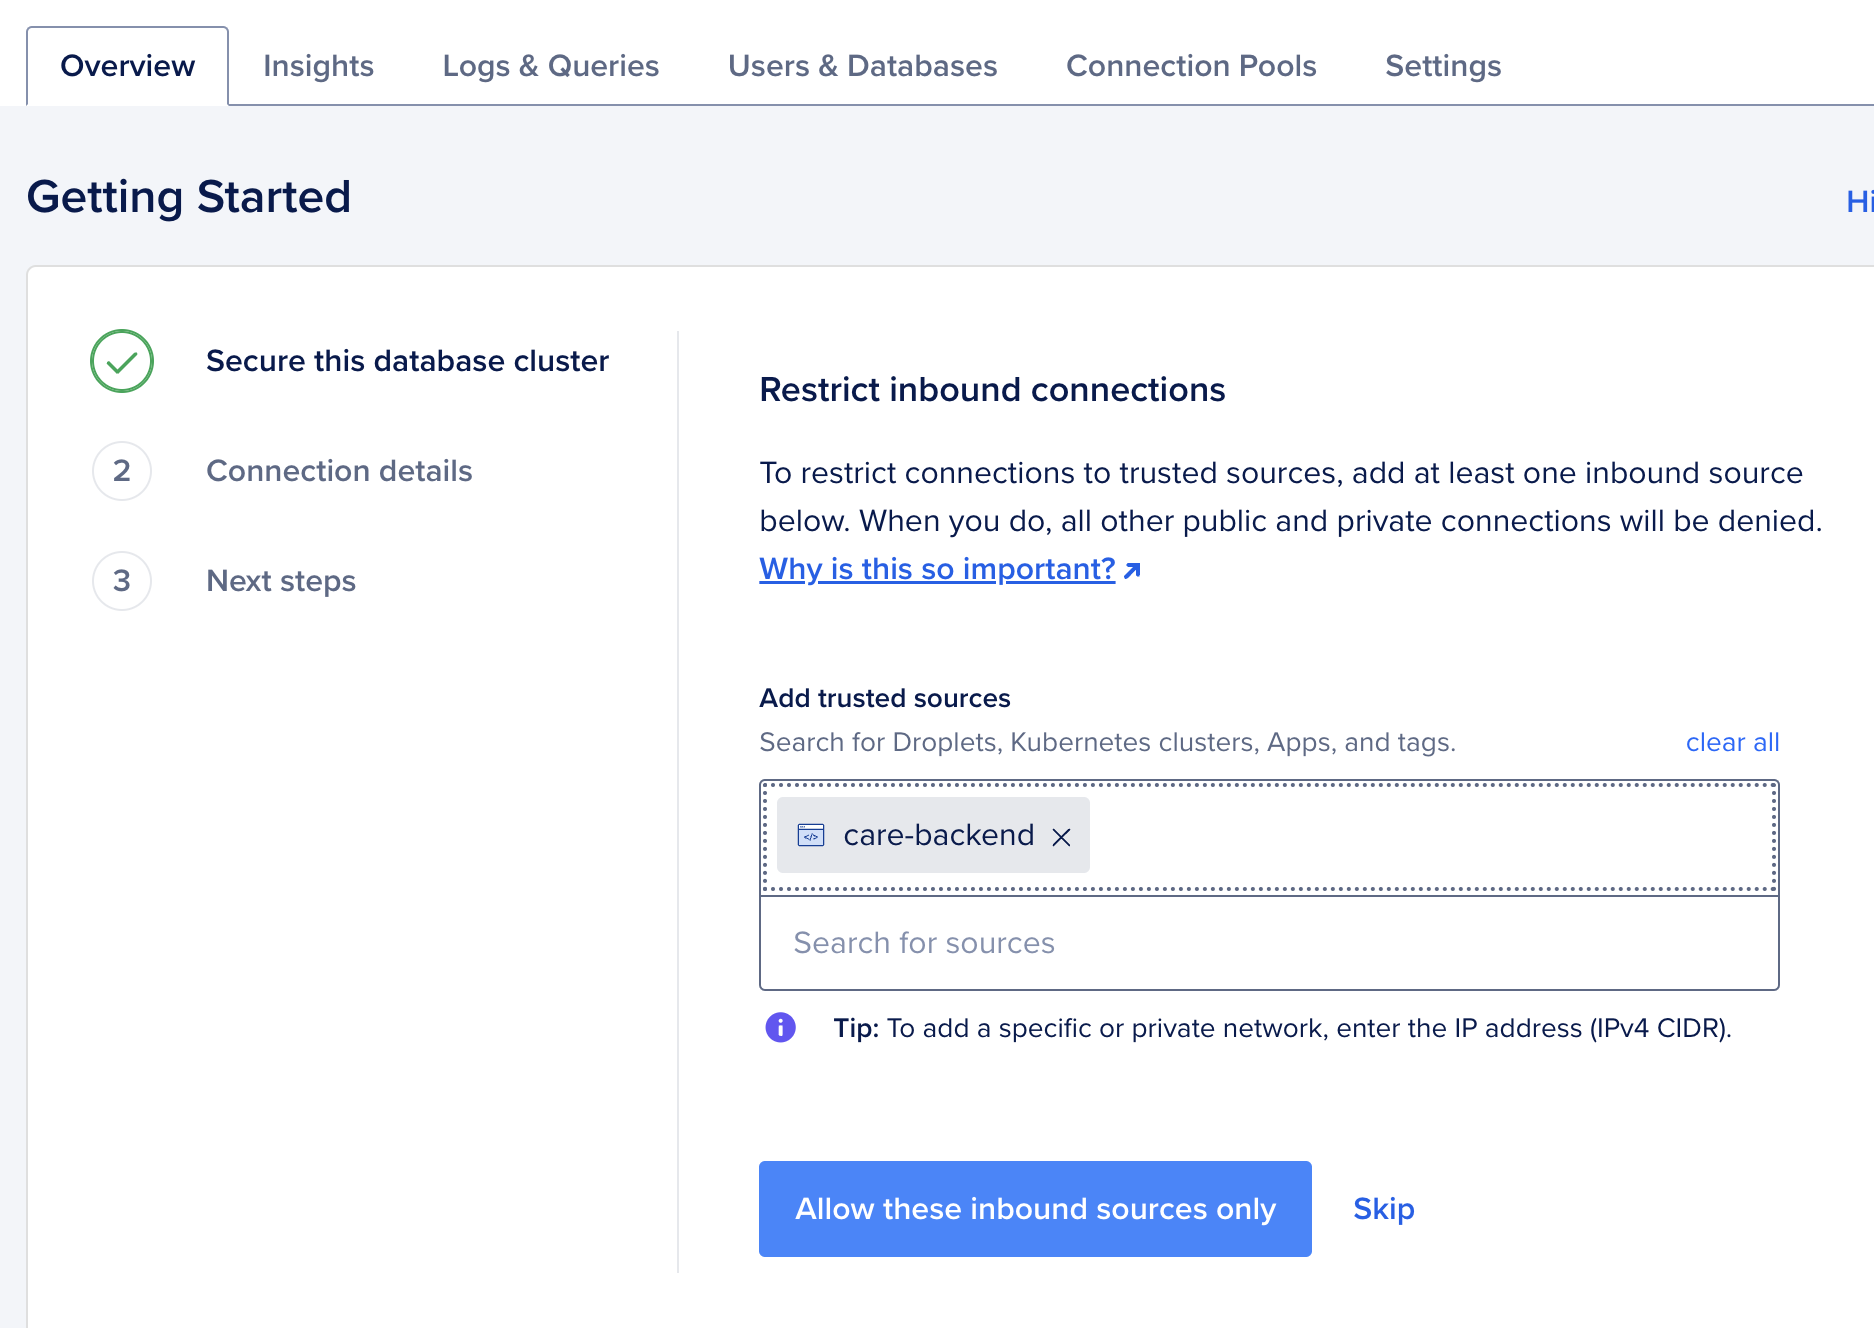
Step 5: Secure Database Access
5.1 Restrict Access
-
Navigate to the Database settings.
-
Add the Care backend app as a trusted source.
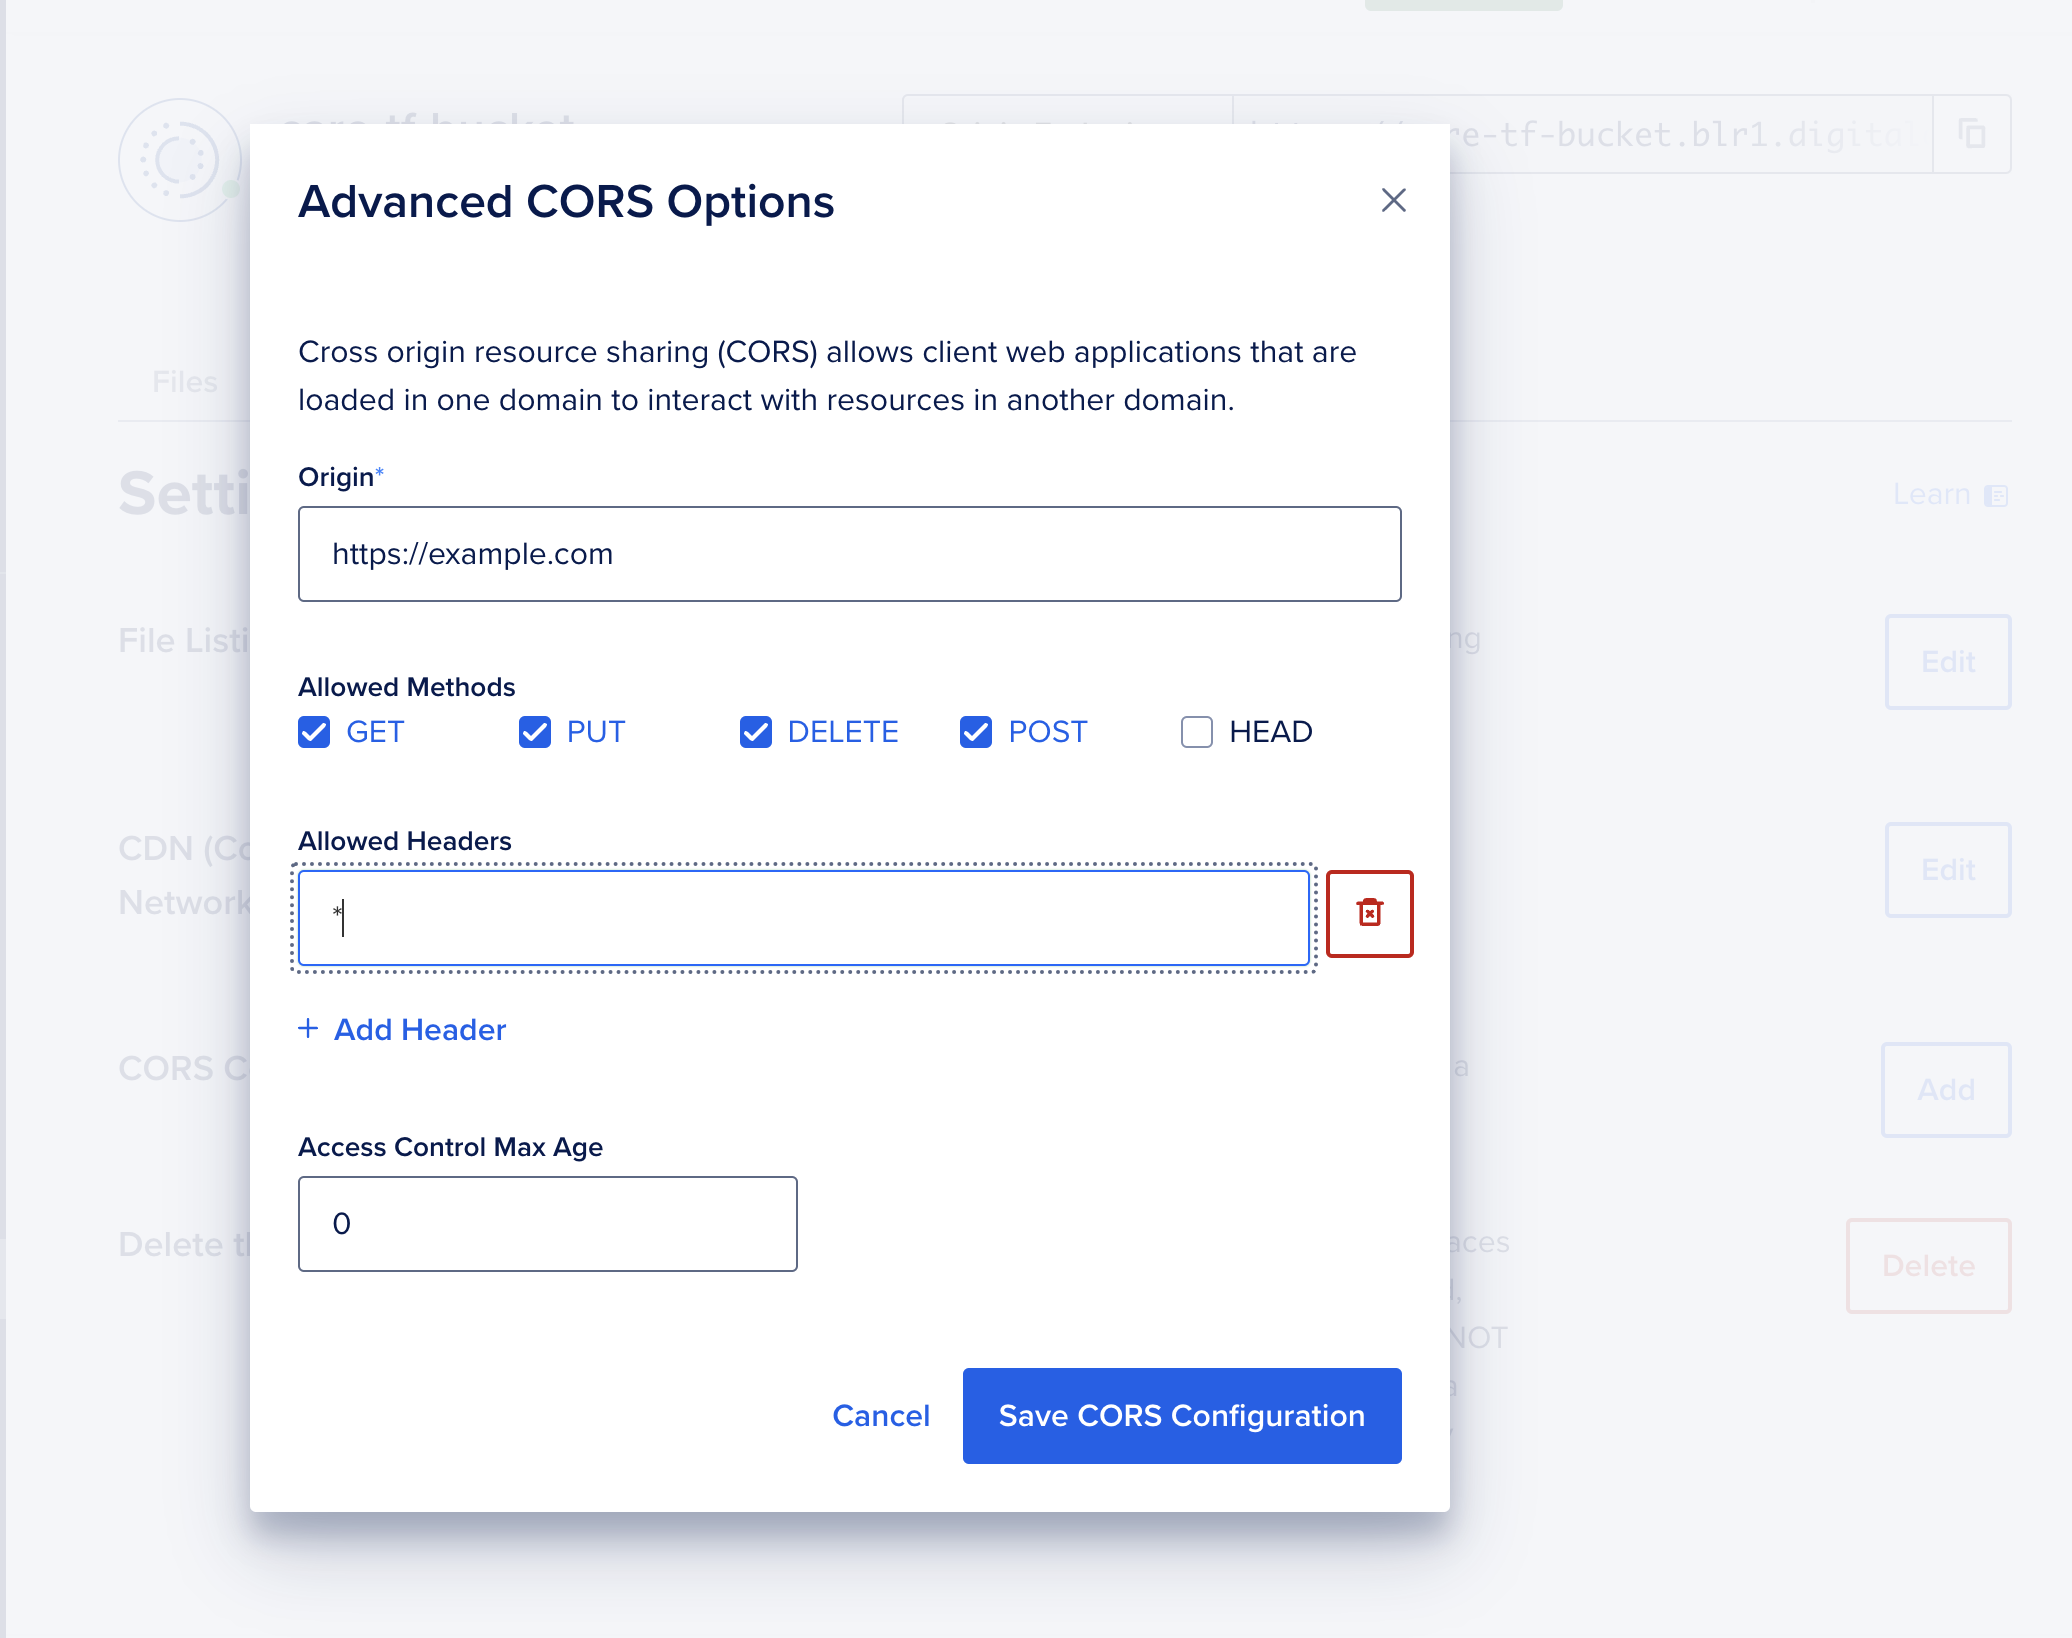
Step 6: Configure CORS for Spaces
6.1 Go to Bucket Settings
-
Open your bucket in Spaces.
-
Add the following CORS configuration:
[
  {
    "AllowedHeaders": ["*"],
    "AllowedMethods": ["GET", "POST", "PUT", "DELETE"],
    "AllowedOrigins": ["https://example.com"],
    "ExposeHeaders": []
  }
]
Final Steps
-
Verify Deployment:
- Test the backend and frontend by accessing the respective domains.
- Ensure all components (Redis, Celery Worker, Beat) are running.
-
Optimize Security:
-
Use SSL certificates (e.g., Let’s Encrypt) to enable HTTPS.
-
Configure firewall rules to restrict access.
-
Conclusion
You’ve successfully deployed the Care application on DigitalOcean! With the database, object storage, backend, and frontend configured, your application is ready for use. 🚀
For troubleshooting, feel free to join our Community on Slack at slack.ohc.network. You may also refer to the official DigitalOcean Documentation for any questions about DigitalOcean.